

Odoo
Odoo is an open-source suite of integrated business applications, CRM, Sales, Invoicing, Inventory, Purchase, Accounting, Projects, HR, and more, that many companies run as their core ERP. Connecting Odoo to Stacksync lets your workflows read and write records across any of these apps, so you can automate operations and keep Odoo in sync with the rest of your business systems.
Connect Odoo
Connect your Odoo instance and start using it with Stacksync.
Requirements
- An Odoo account with external API access enabled
- On Odoo Online, external API access requires the Custom pricing plan. Odoo.sh and self-hosted instances have no plan restriction.
- Permission to generate an API key for your Odoo user
1. Create a new connection
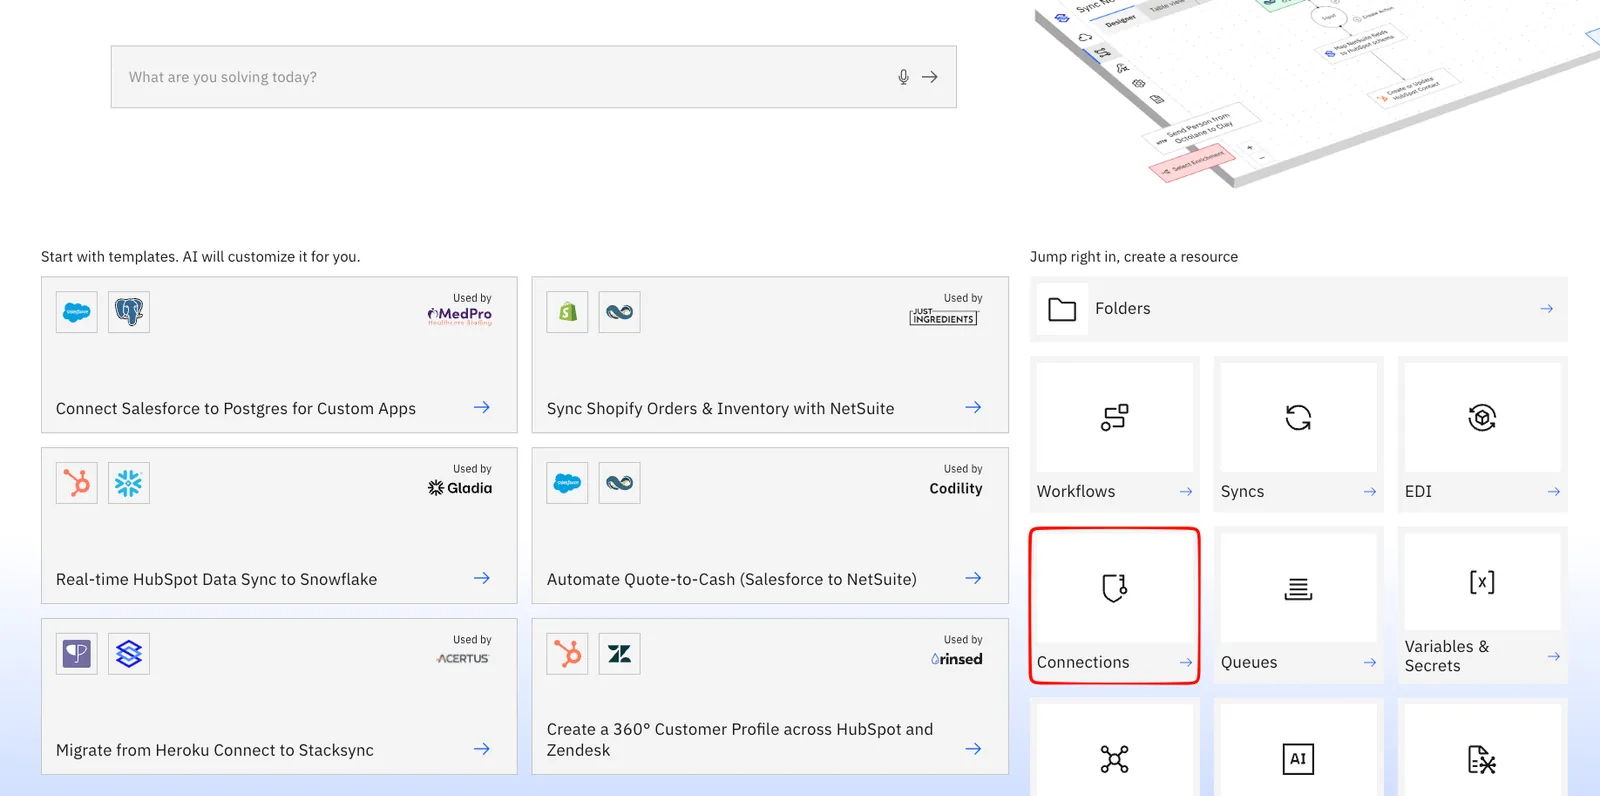
In Stacksync, click Create a new connection.
2. Select Odoo
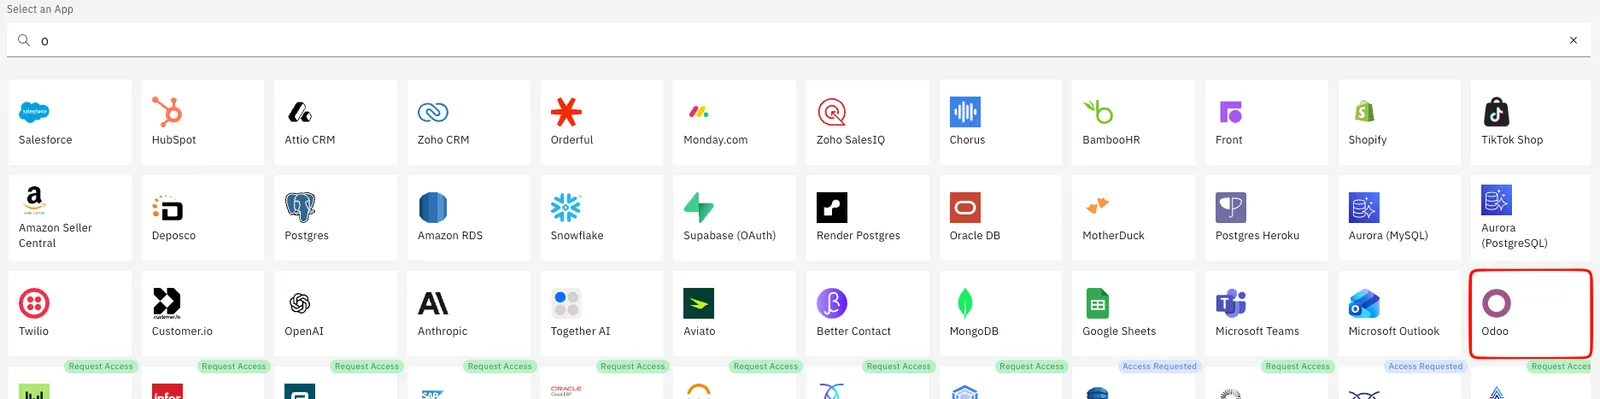
Click the Odoo logo from the list of connectors.
3. Gather your connection details
In the following steps, you will collect four values from your Odoo account:
- Instance URL
- Database
- Username
- API Key
4. Find your Instance URL and Database
Your Instance URL is your Odoo web address, up to the domain only — no page path.
- Example:
https://mycompany.odoo.com - Copy it from your browser's address bar and remove anything after
.com(e.g. drop/web#...).
Your Database name:
- On Odoo Online, it is the subdomain of your URL — for
https://mycompany.odoo.com, the database ismycompany. - On Odoo.sh / self-hosted, use your database name (ask your Odoo administrator if unsure).
Tip: Paste only the domain (
https://mycompany.odoo.com), not the full page URL.
5. Find your Username
Your Username is the login email of the Odoo user the connection will act as.
- Click your profile avatar (top-right) → Preferences (or My Profile).
- Your email address shown there is your username.
6. Generate your API Key
- Click your profile avatar (top-right) → Preferences.
- Open the Account Security tab.
- Click New API Key.
- Re-enter your password when prompted to confirm.
- Enter a description (for example,
Stacksync) and generate the key. - Copy the key immediately — Odoo shows it only once and it cannot be retrieved later.
Read vs. write access: A read-only key is enough for read-only workflows. For creating, updating, or deleting records, use a full-access key. If writes are rejected with a "read access only" message, your Odoo administrator needs to enable full API access for your user.
Recommended: Use a dedicated integration user (for example,
integrations@yourcompany.com) rather than a personal login, so actions are clearly attributed and don't depend on one person's account.
7. Fill in the Stacksync form
Enter the four values into the connection form:
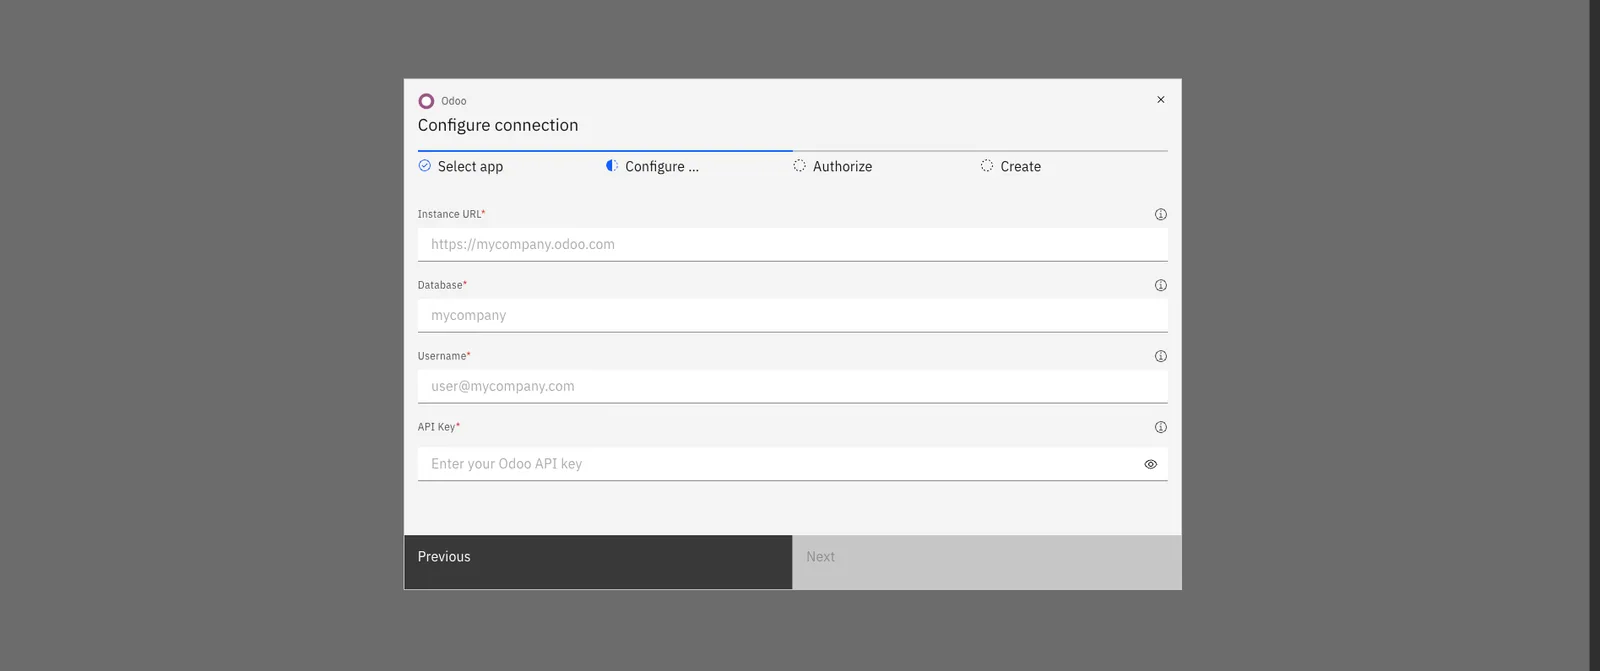
| Field | Value |
|---|---|
| Instance URL | https://mycompany.odoo.com |
| Database | mycompany |
| Username | user@mycompany.com |
| API Key | the key you generated in step 6 |
Click Connect.
You are all set! 🎉
Your Odoo connection is ready to use in your Stacksync workflows.