

Authorize SuiteAnalytics
9 minute guide to authorize SuiteAnalytics and connect it to Stacksync using NetSuite credentials.
If you do not see the screens required to create your API token or to enable SuiteAnalytics Connect, it means you do not have the necessary access rights to authorize your SuiteAnalytics instance. An Administrator role (or another role with the proper NetSuite permissions) is required to perform the connection setup.
-
Log in to your NetSuite account and navigate to Setup > Company > Enable Features.
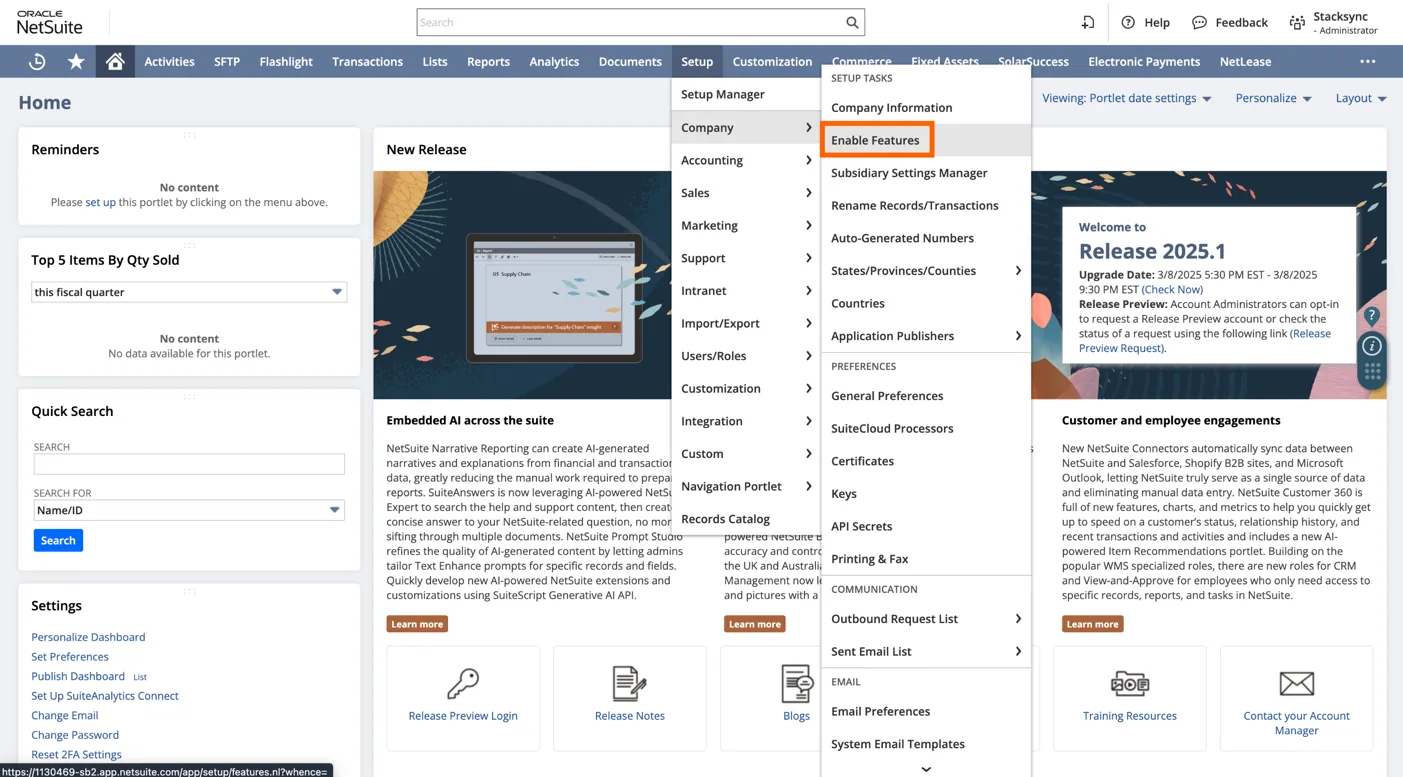
Navigate to the NetSuite features configuration panel
-
Under the ”SuiteCloud” header make sure the REST WEB SERVICES checkbox is checked.
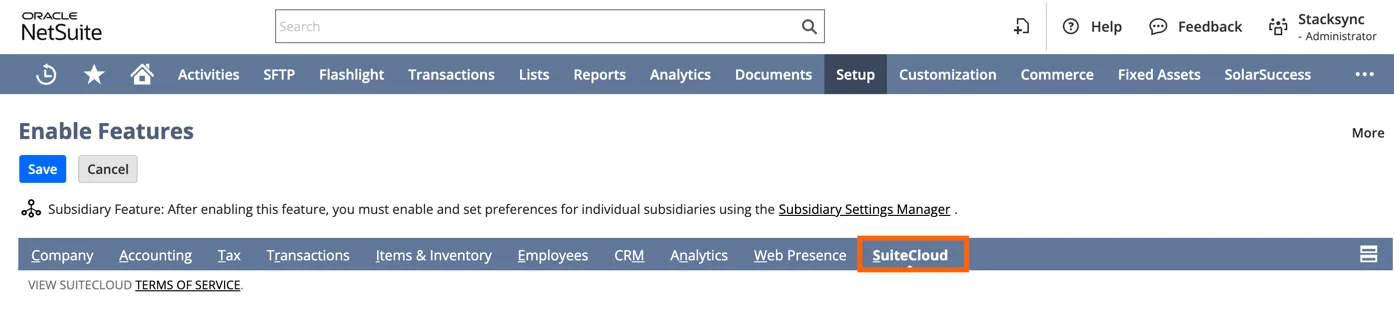
Click "SuiteCloud"
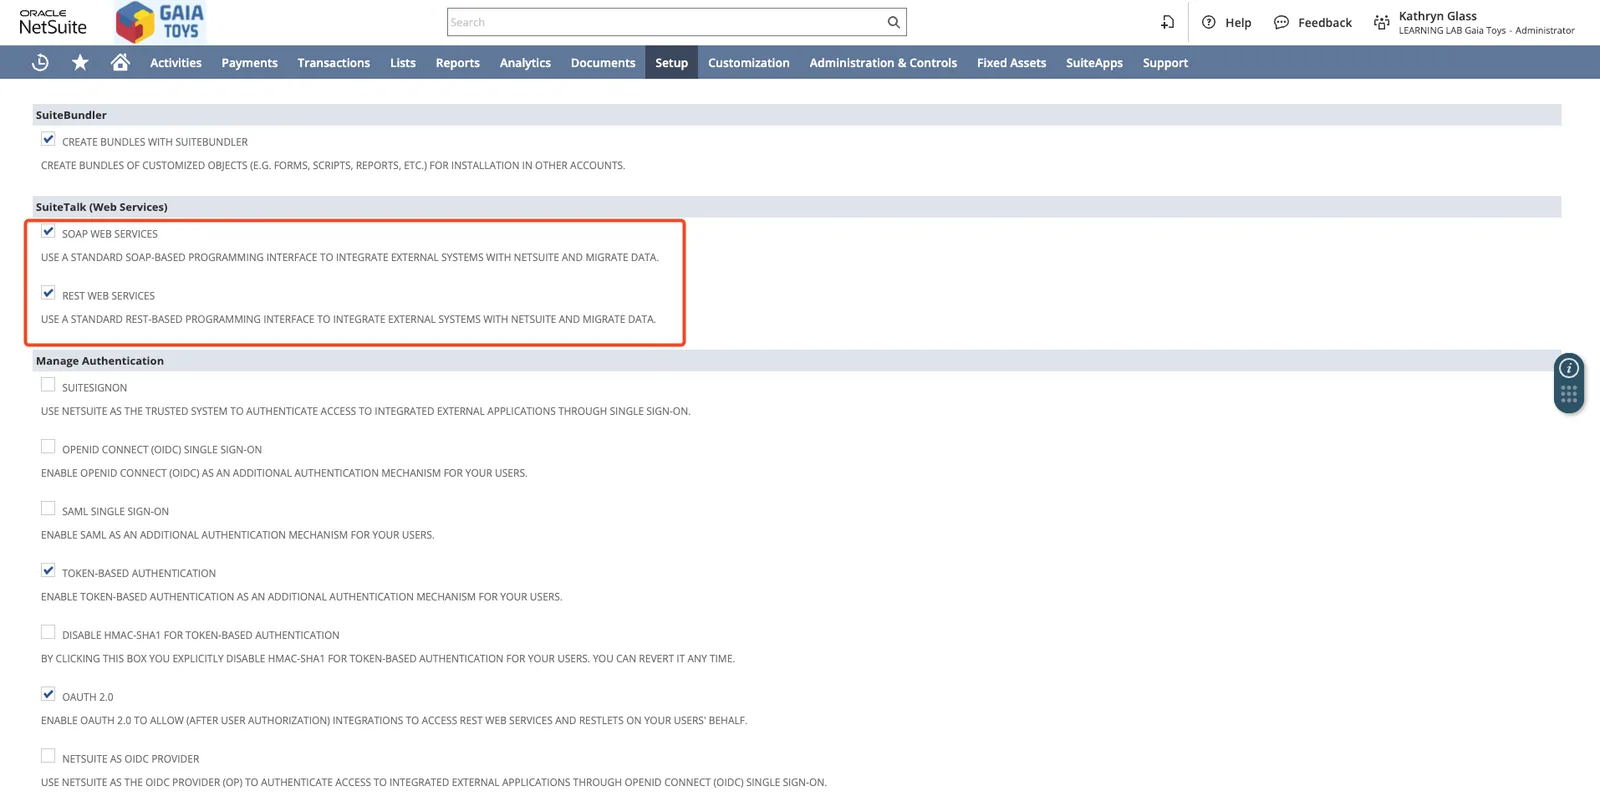
In the SuiteTalk section, enable SOAP WEB SERVICES and REST WEB SERVICES.
-
Under the ”Manage Authentication” header make sure the TOKEN-BASED AUTHENTICATION checkbox is checked.
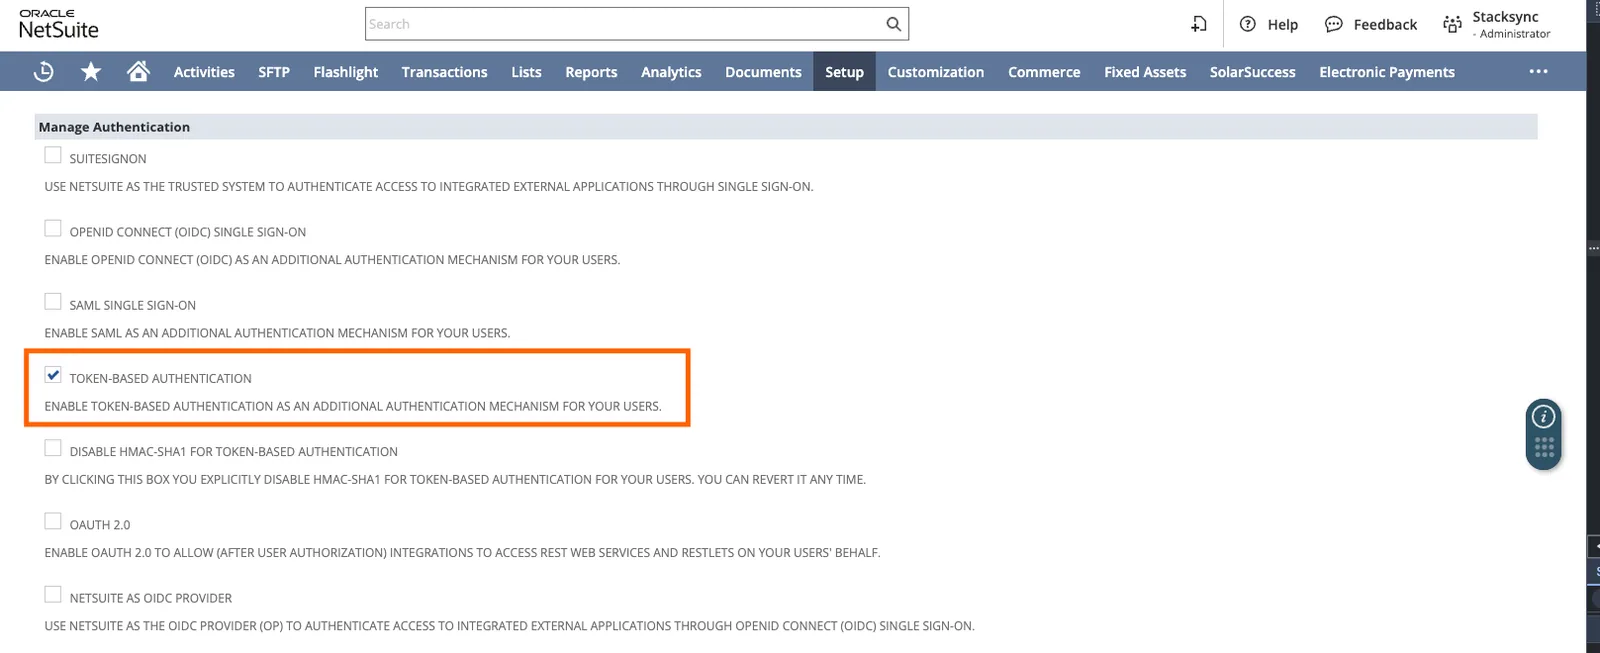
Activate Token Based Authentication
-
Under the ”Analytics” header make sure the SuiteAnalytics Connect checkboxes is checked.

Click "Analytics"
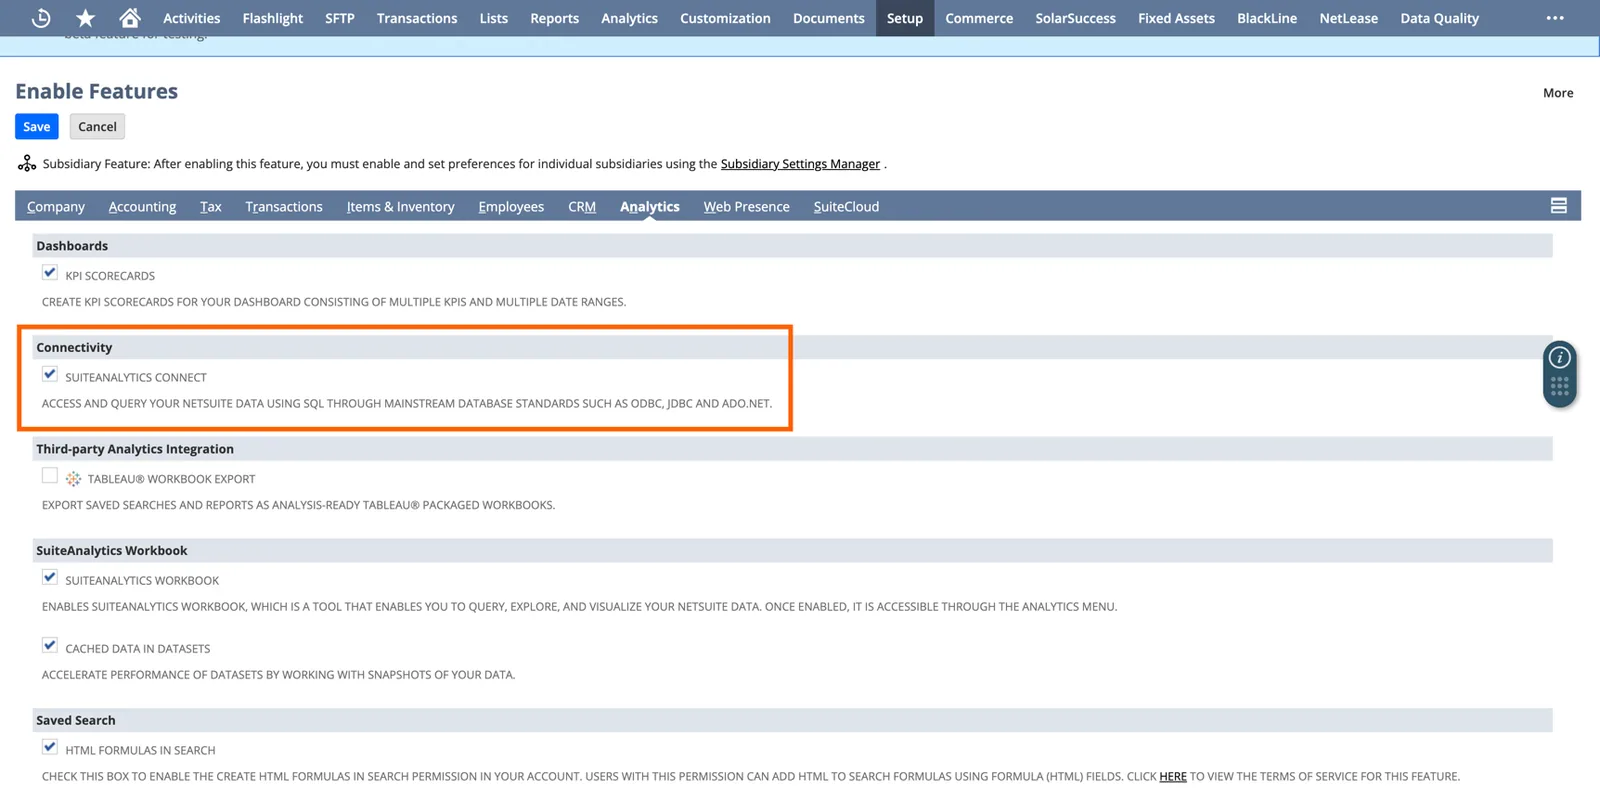
In the Connectivity section, enable SUITEANALYTICS CONNECT.
-
Click the save button at the bottom of the page.
-
-
Navigate to Setup > Integration > Manage Integrations > New.
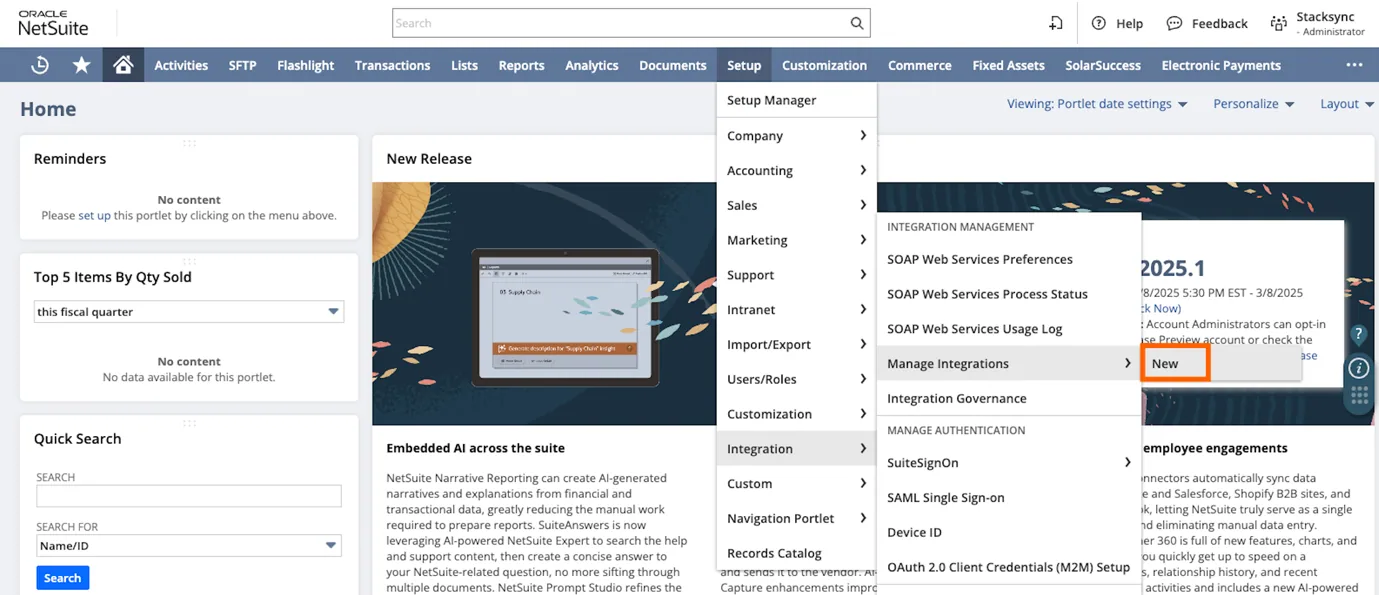
Create a new integration in NetSuite
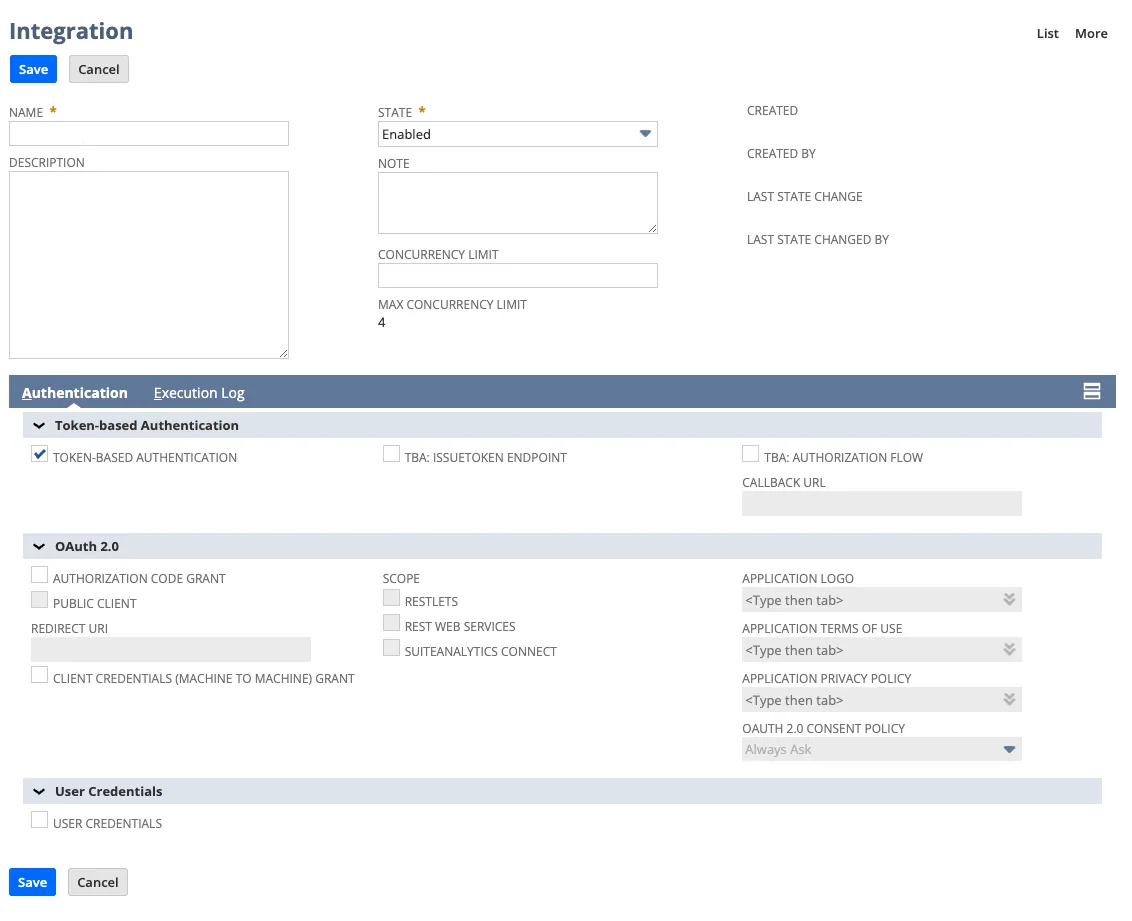
Configure the new Stacksync integration in NetSuite
-
Give your application a NAME. Recommended name:
Stacksync SuiteAnalytics -
Select
Token-based Authenticationonly -
Click the save button.
-
The client credentials will now be displayed and be sure to copy the Consumer Id and Consumer Secret.
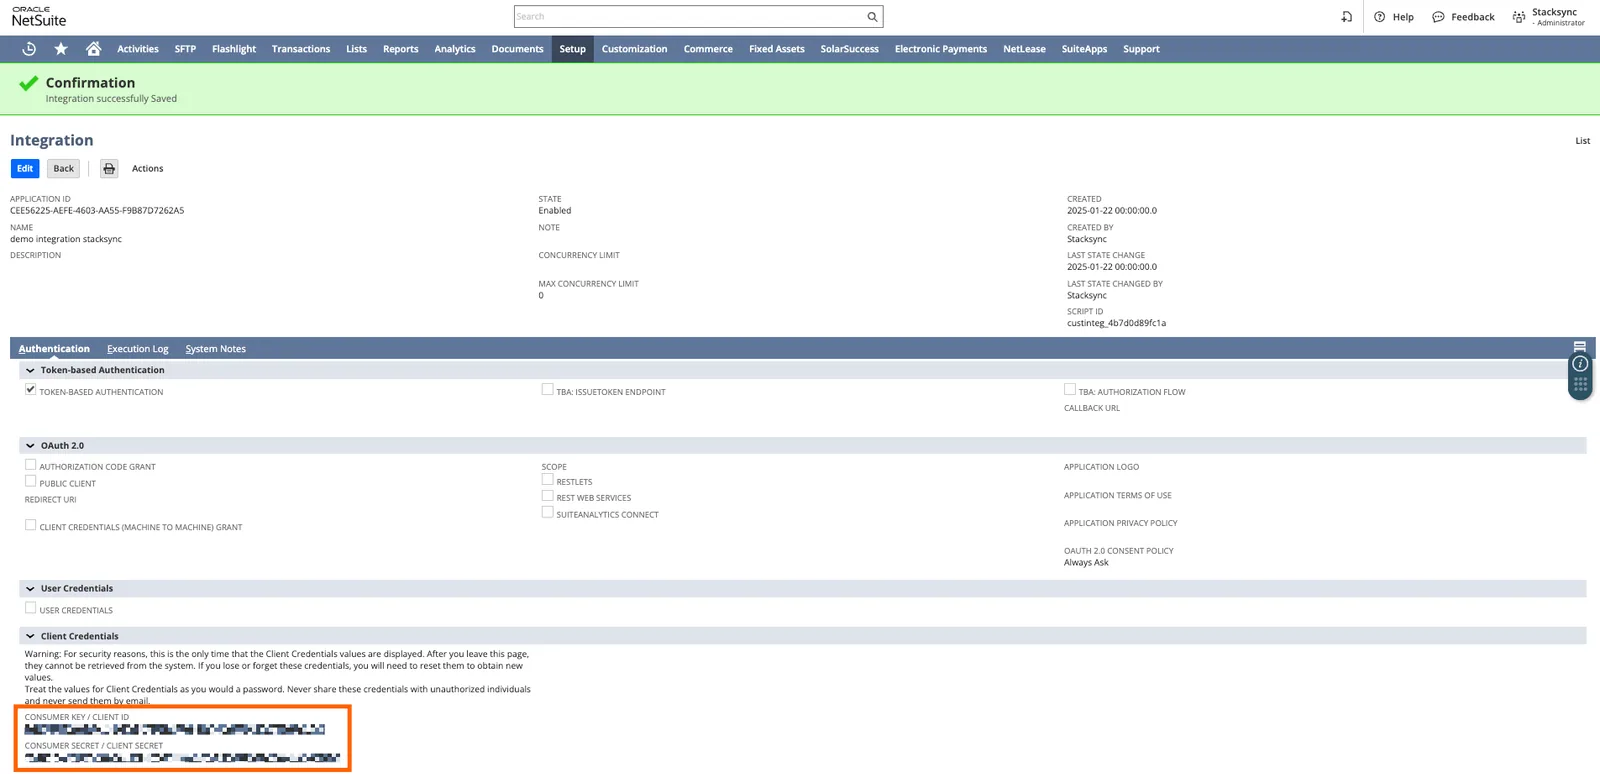
Save "Consumer ID" and "Consumer Secret" values safely (to be used in the next steps of this tutorial).
-
-
Navigate to the homepage by clicking the home icon.
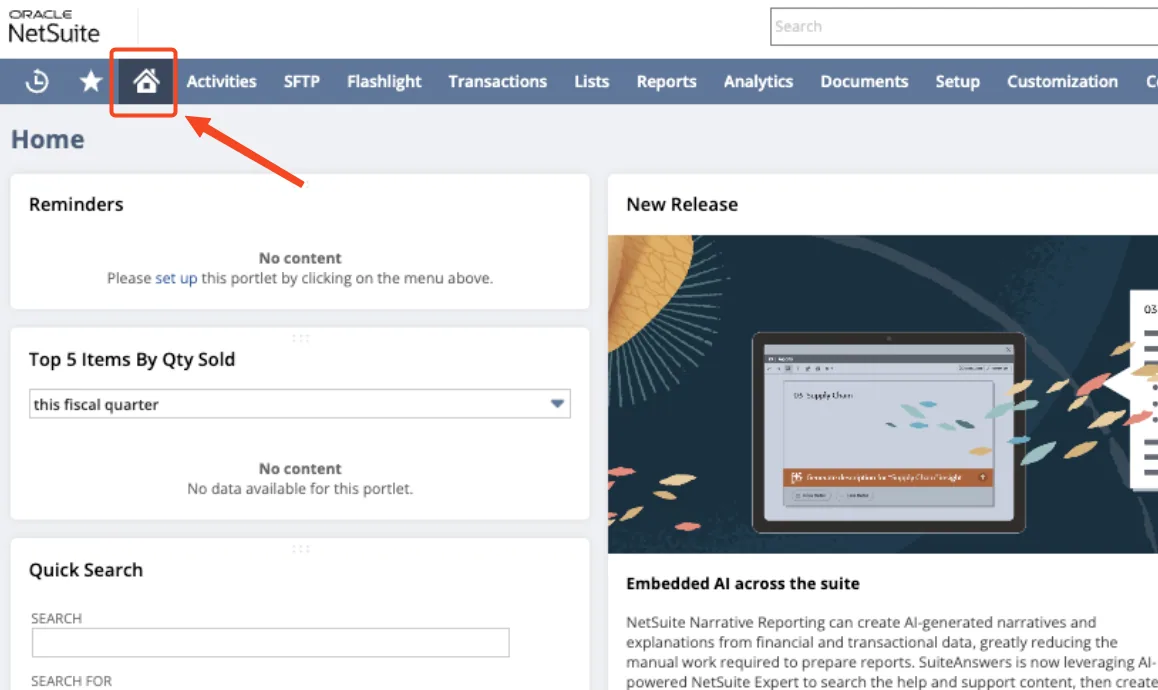
Navigate to the NetSuite homepage
-
At the bottom left corner click the Manage Access Tokens button.
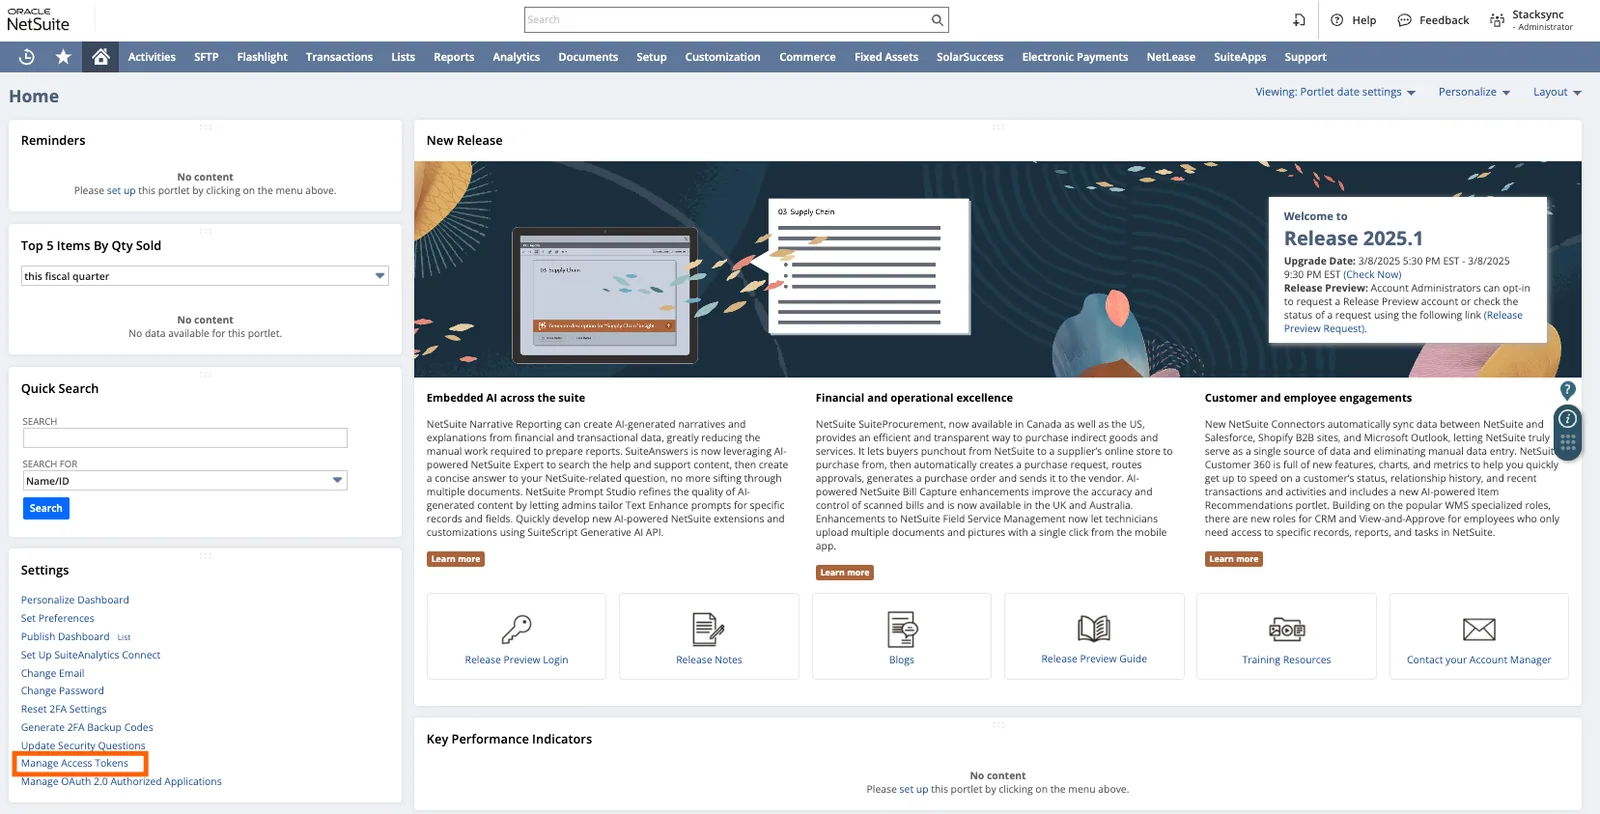
Click "Manage Access Tokens"

Click "New Access Token"
- Select the Application Name you created for this integration.
- Enter a ”Token Name”.
- Save your new access token.
- The token credentials will now be displayed. Copy the ”Token ID” & ”Token Secret”.
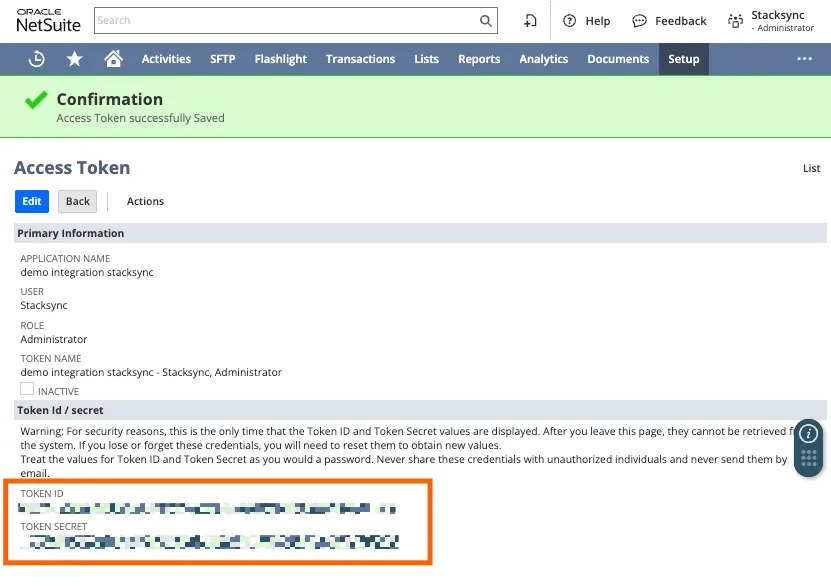
Save "Token ID" and "Token Secret" values safely (to be used in the next steps of this tutorial).
-
Navigate to Setup > Users/Roles > Manage Roles.
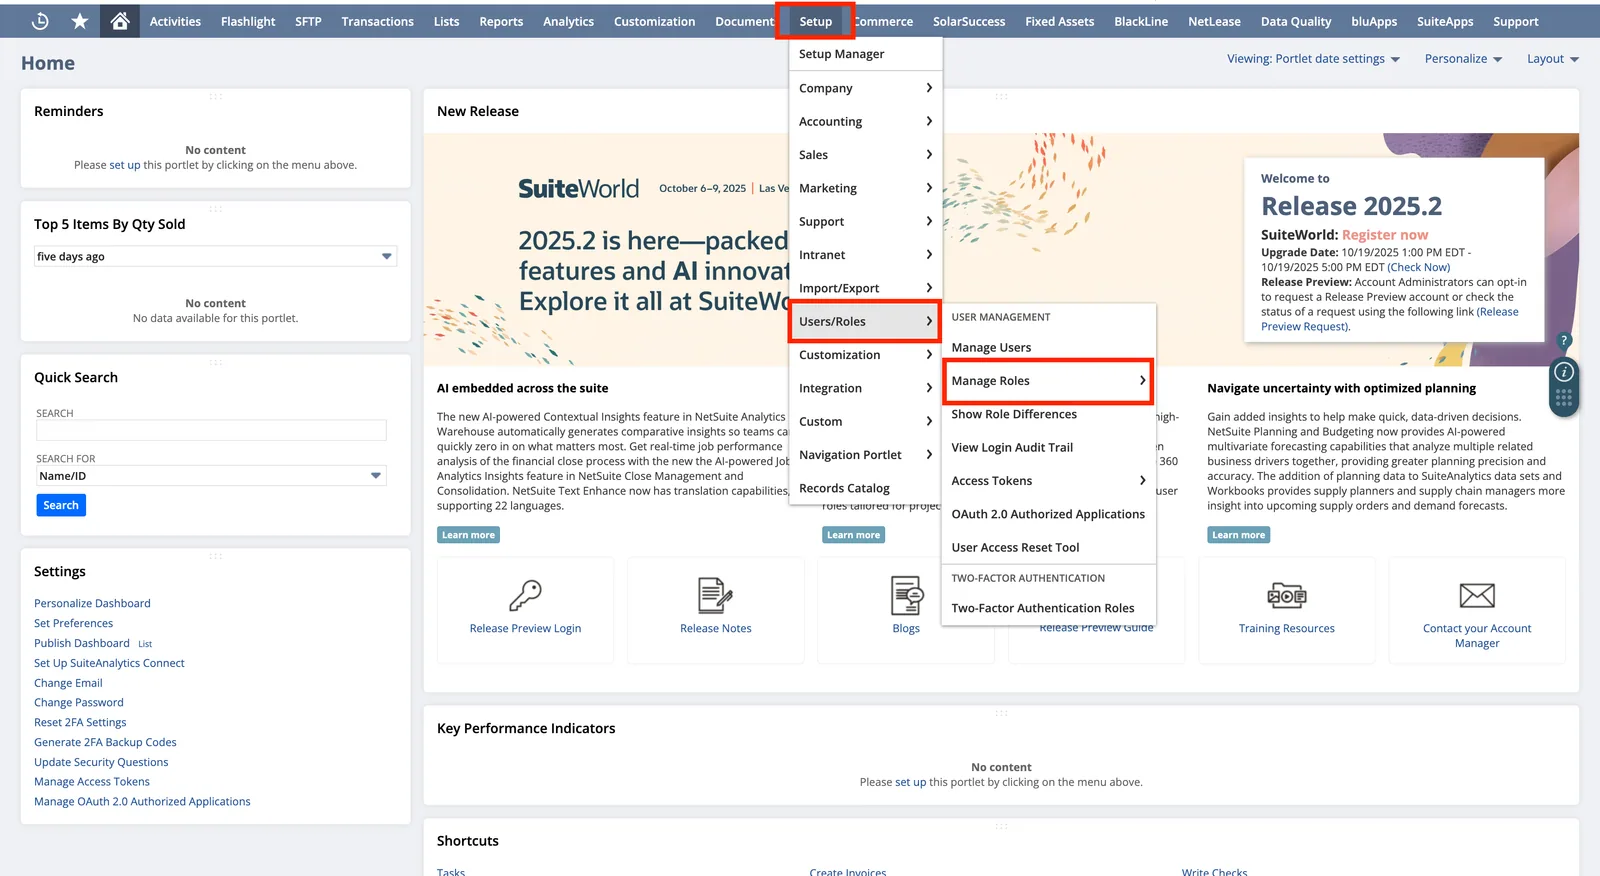
Navigate to Setup > Users/Roles > Manage Roles.
- Either create a new role or edit an existing role.
- Navigate to Permissions > Setup
- Add SuiteAnalytics Connect and SuiteAnalytics Connect - Read All with Level Full.
- Save changes.
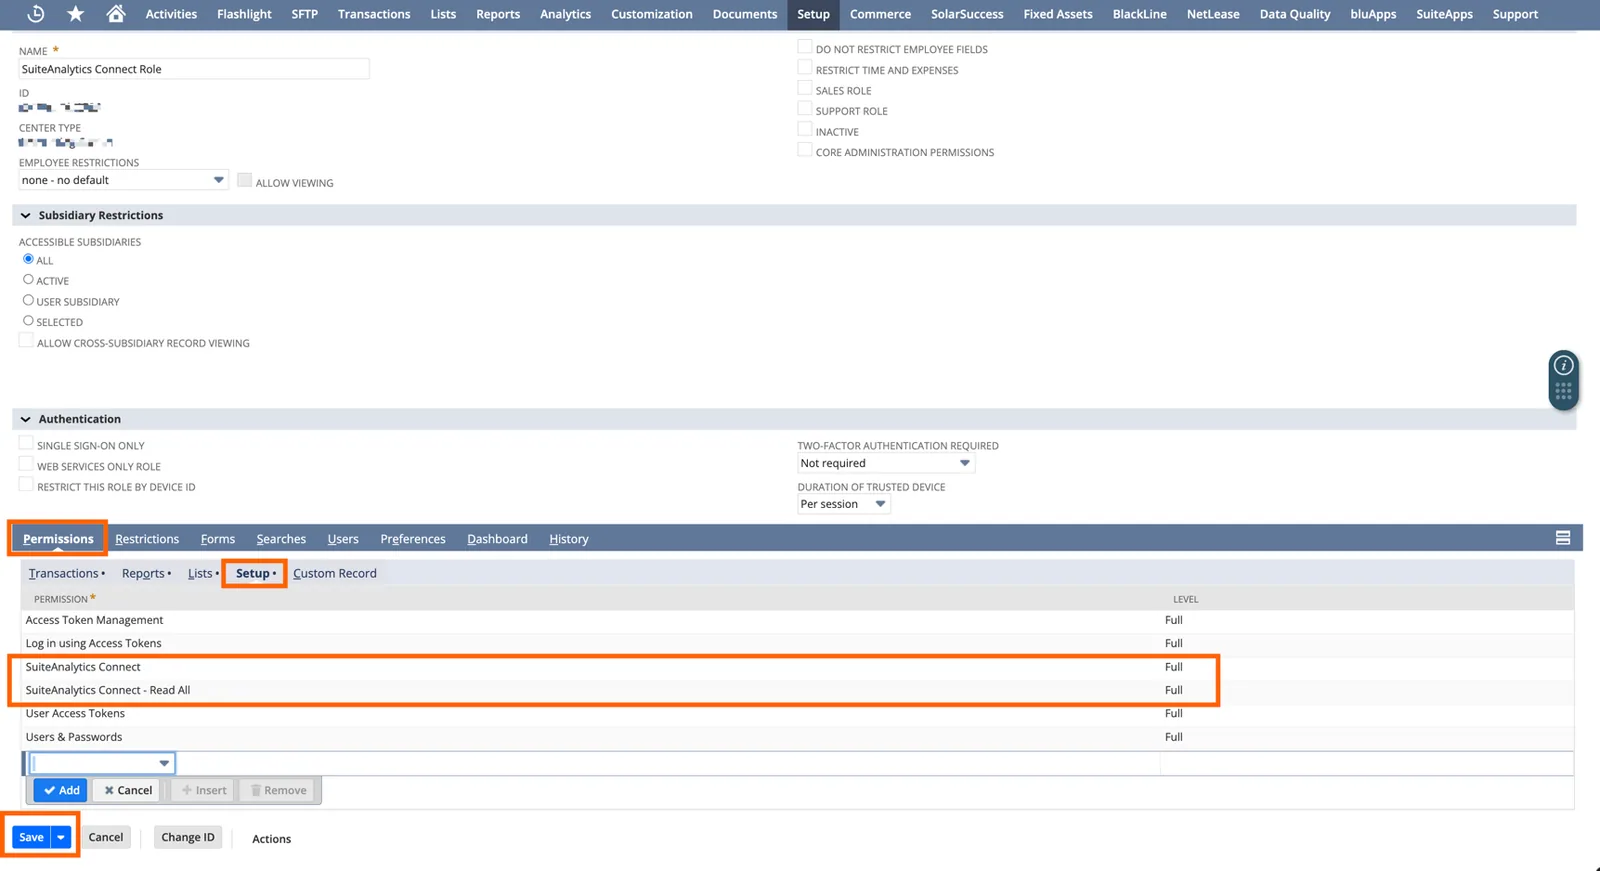
Add SuiteAnalytics Connect and save.
-
Get the
Role IDin the URL on the Role Page. It is formatted as:role.nl?id=<role_id>. -
Get the
Account IDfrom the URL, the domain name has the following format:<account_id>.app.netsuite.com -
You now have all the necessary credentials to grant Stacksync access to your SuiteAnalytics Connect. Go back to the Stacksync dashboard at https://app.stacksync.com
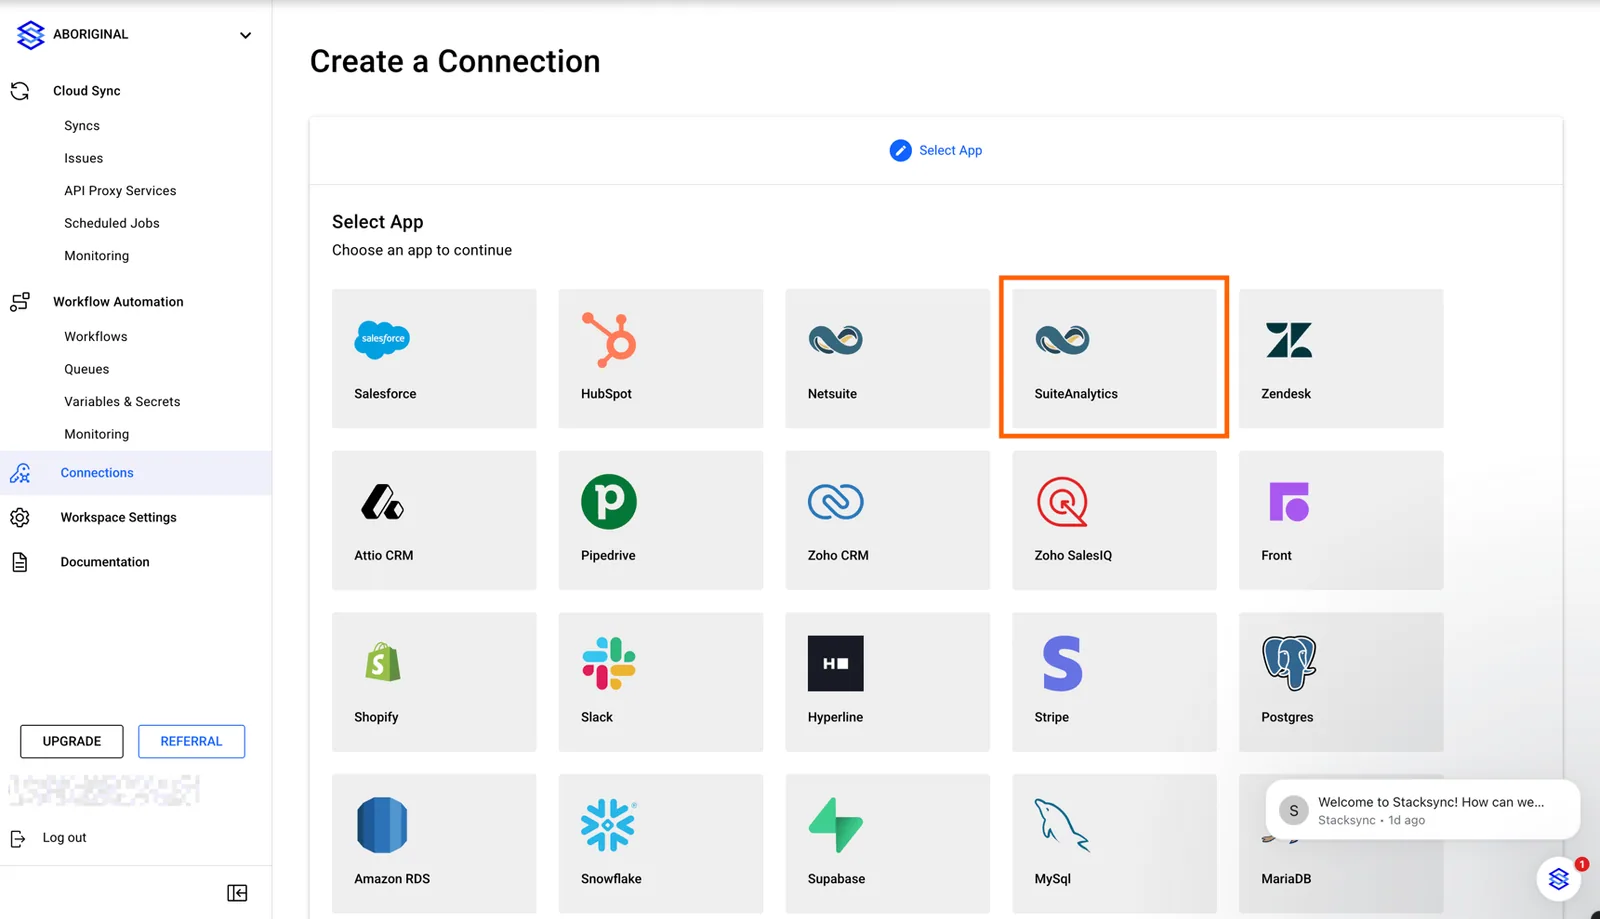
Click on SuiteAnalytics Connector
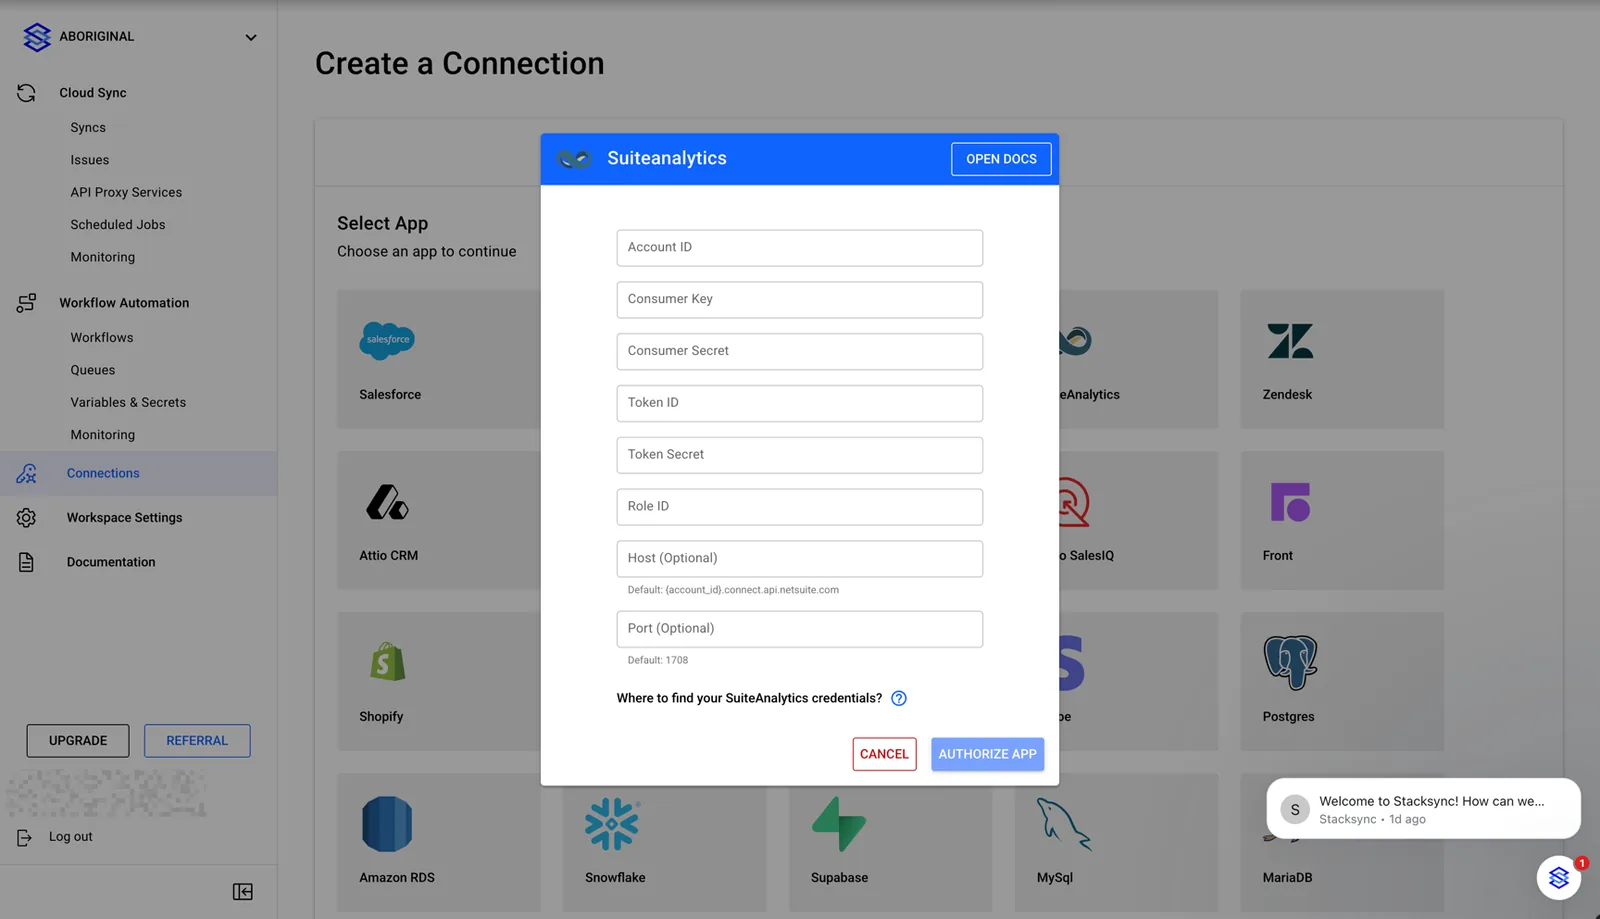
Insert the credentials obtained from the preview steps in the SuiteAnalytics Connector
You successfully granted Stacksync access to your SuiteAnalytics Connect! 🎉
Feel free to reach out to us at hello@stacksync.com if there is anything we can help with!