

OKTA
SSO and SCIM for OKTA
The Stacksync Okta app is currently under review by Okta. Until the app is published on the Okta Marketplace, here is a guide to synchronize your Okta users automatically into Stacksync by creating the SCIM app yourself.
This setup takes ~10 minutes.
SSO is part of the Stacksync Enterprise plan. Contact us at sso@stacksync.com to set it up.
Notes:
- This setup must be implemented by an Okta admin.
- The SCIM integration is associated with a unique Stacksync workspace. If you have multiple workspaces (such as dev, staging, and prod), you will need to set up an SCIM app for each workspace. Each workspace has independent RBAC enforcement.
SSO (SAML) setup instructions
-
On your Okta homepage, go to the admin section.

-
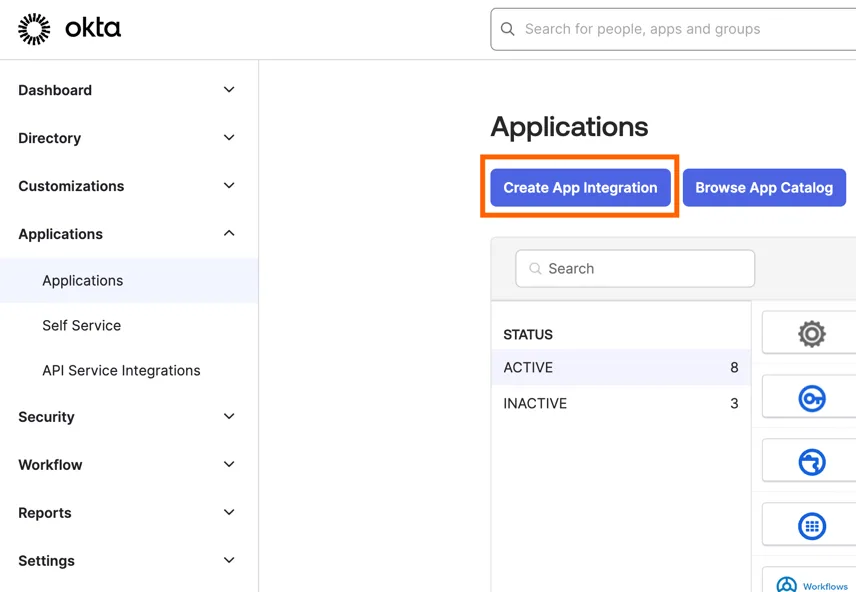
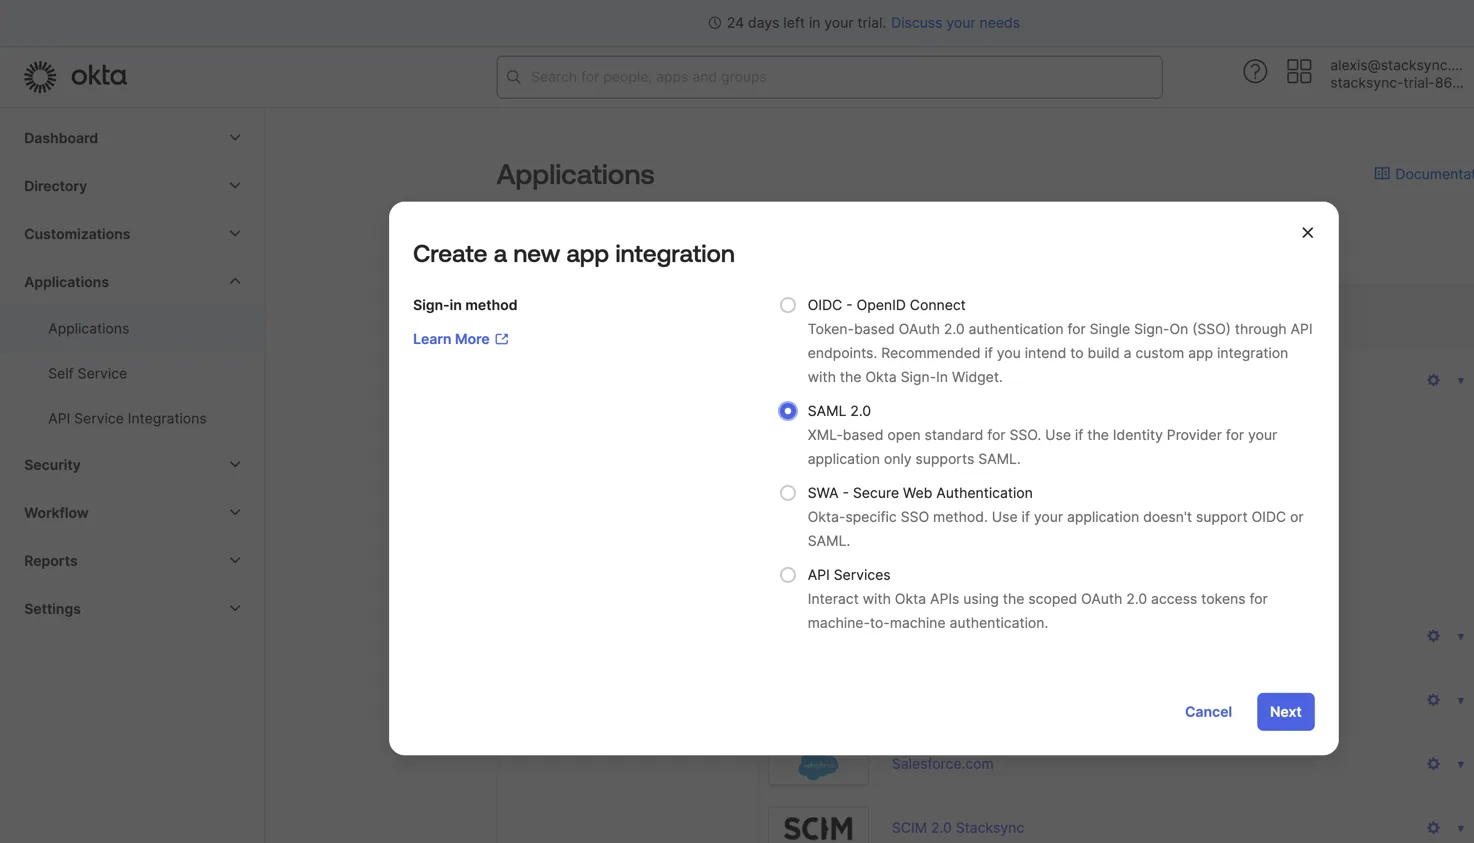
In the Applications section, create an app integration of type SAML 2.0.
-
Set the app name to
Stacksync. You can also add the Stacksync app logo (download the file below).

- Configure your SAML settings with:
- Single sign-on URL:
https://auth.stacksync.com/login/callback?connection=<sso_id_provided_by_stacksync_team_for_you> - Audience URI:
urn:auth0:stacksync:<sso_id_provided_by_stacksync_team_for_you> - Application username:
Email - Update application username on
Create and update - Attribute Statements:
-
name=
emails -
name format=
Basic -
value=
user.email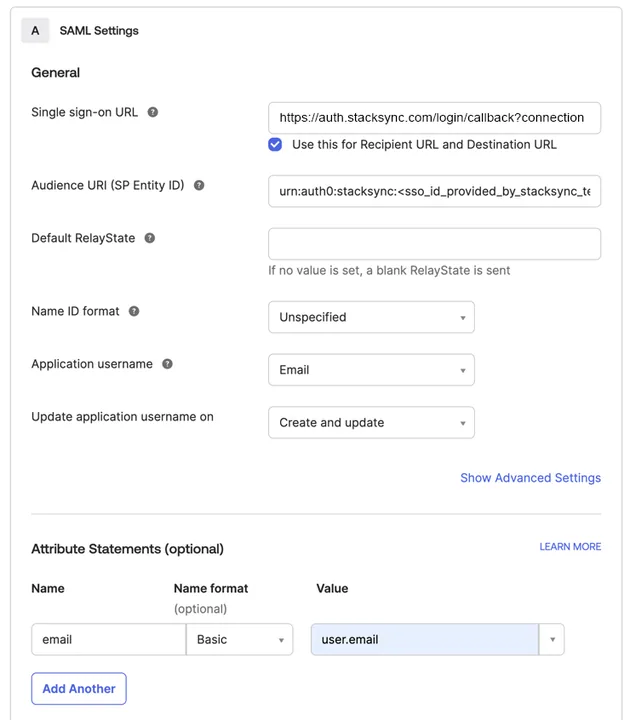
-
- You can skip the
Feedbacksection and clickFinish-
Send the following details to
sso@stacksync.com:-
Identity Provider Single Sign-On URLat the top of the SAML setup instructions page.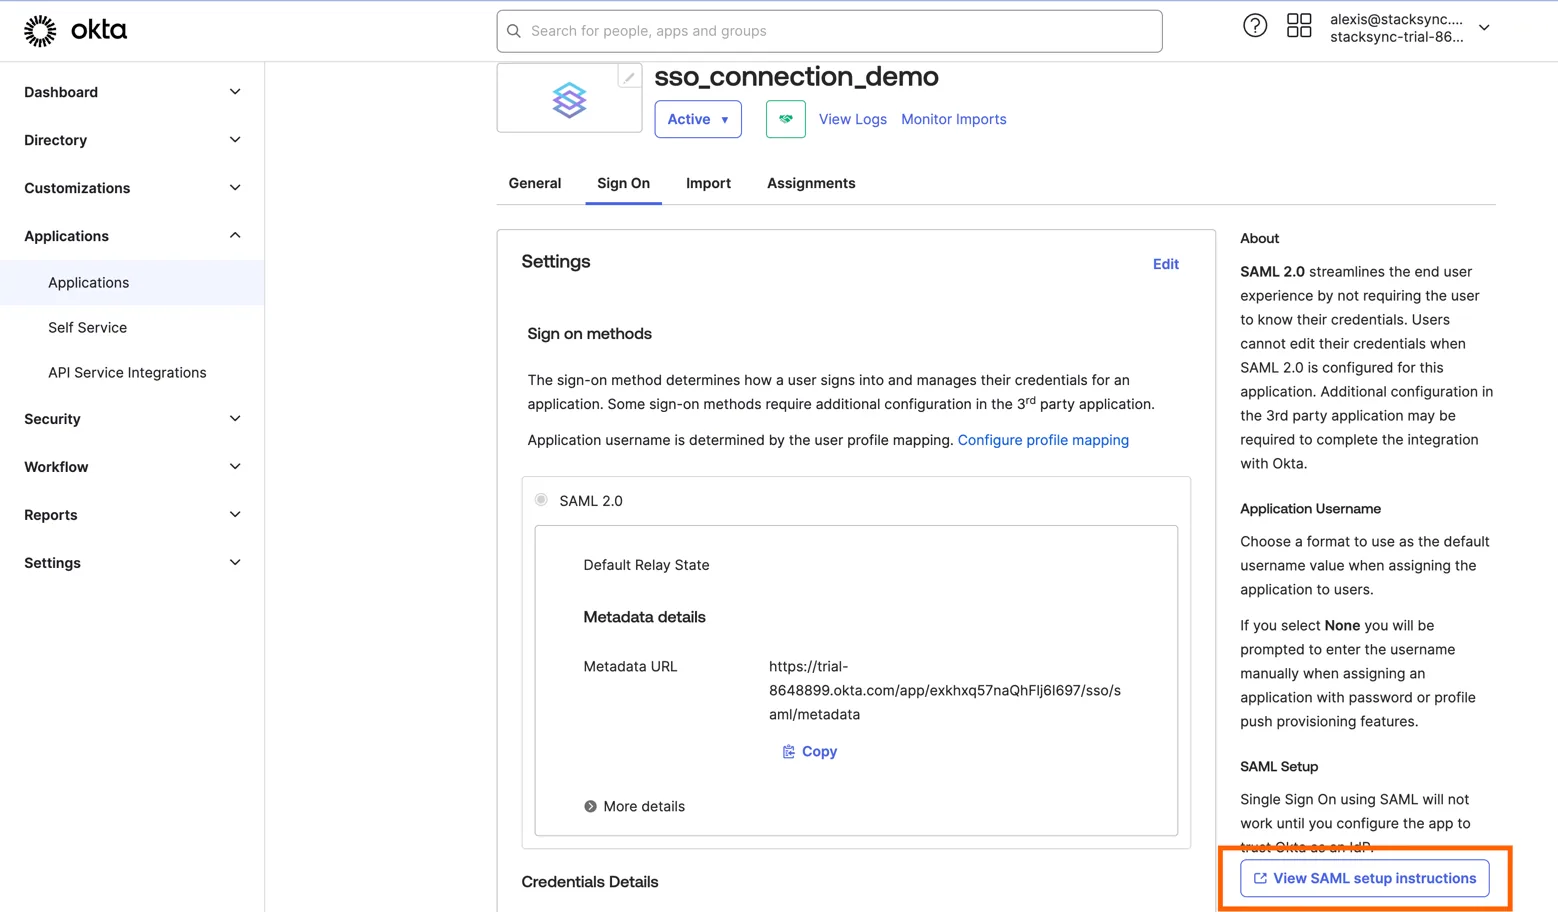
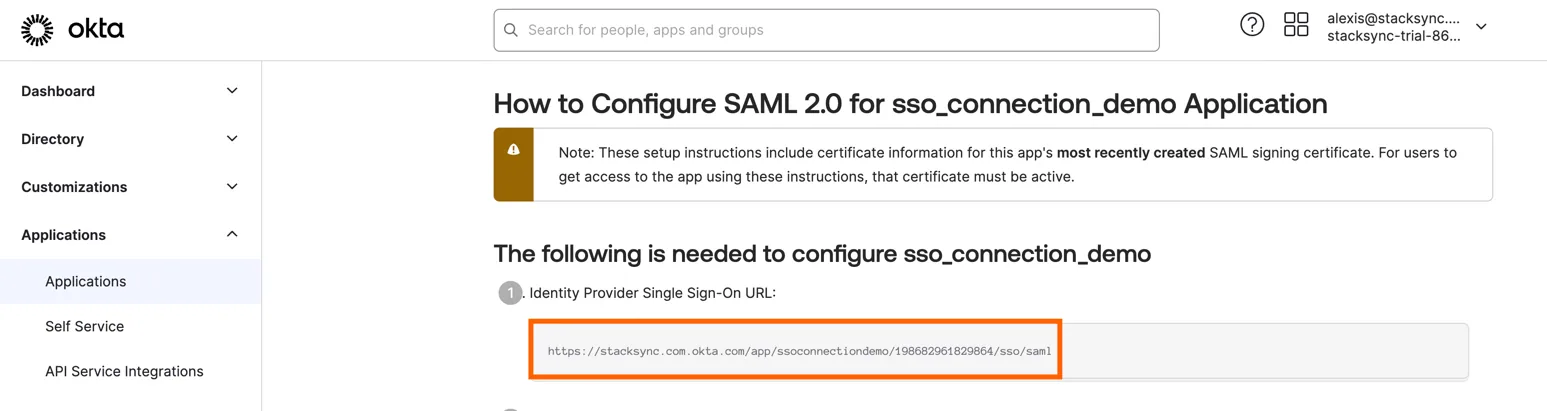
2. SAML Signing CertificatesforSHA2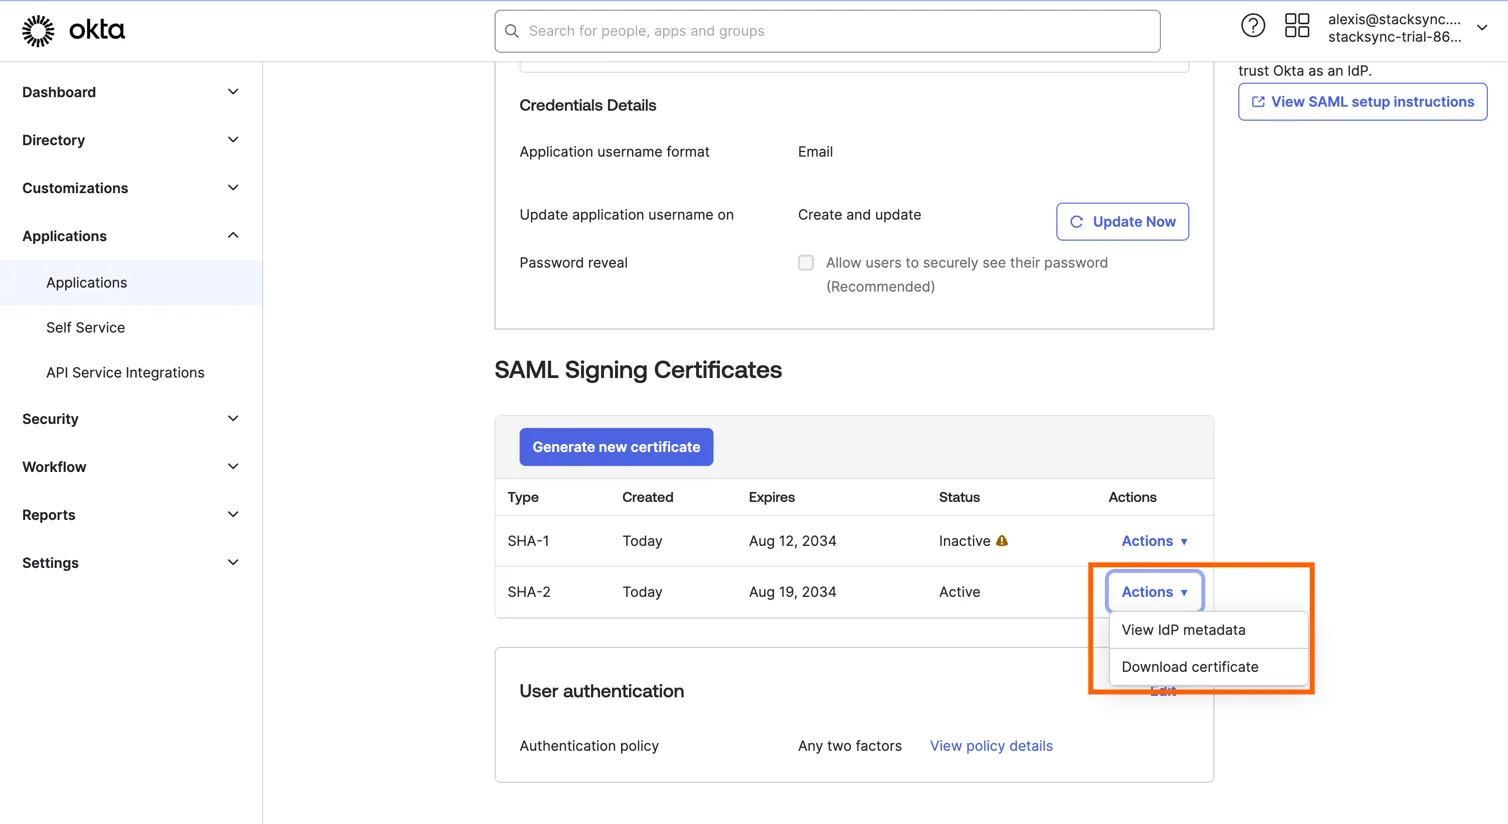
- Once we have received the above information, we will activate SSO and you’re all set!
-
-
- Single sign-on URL:
SCIM setup instructions
-
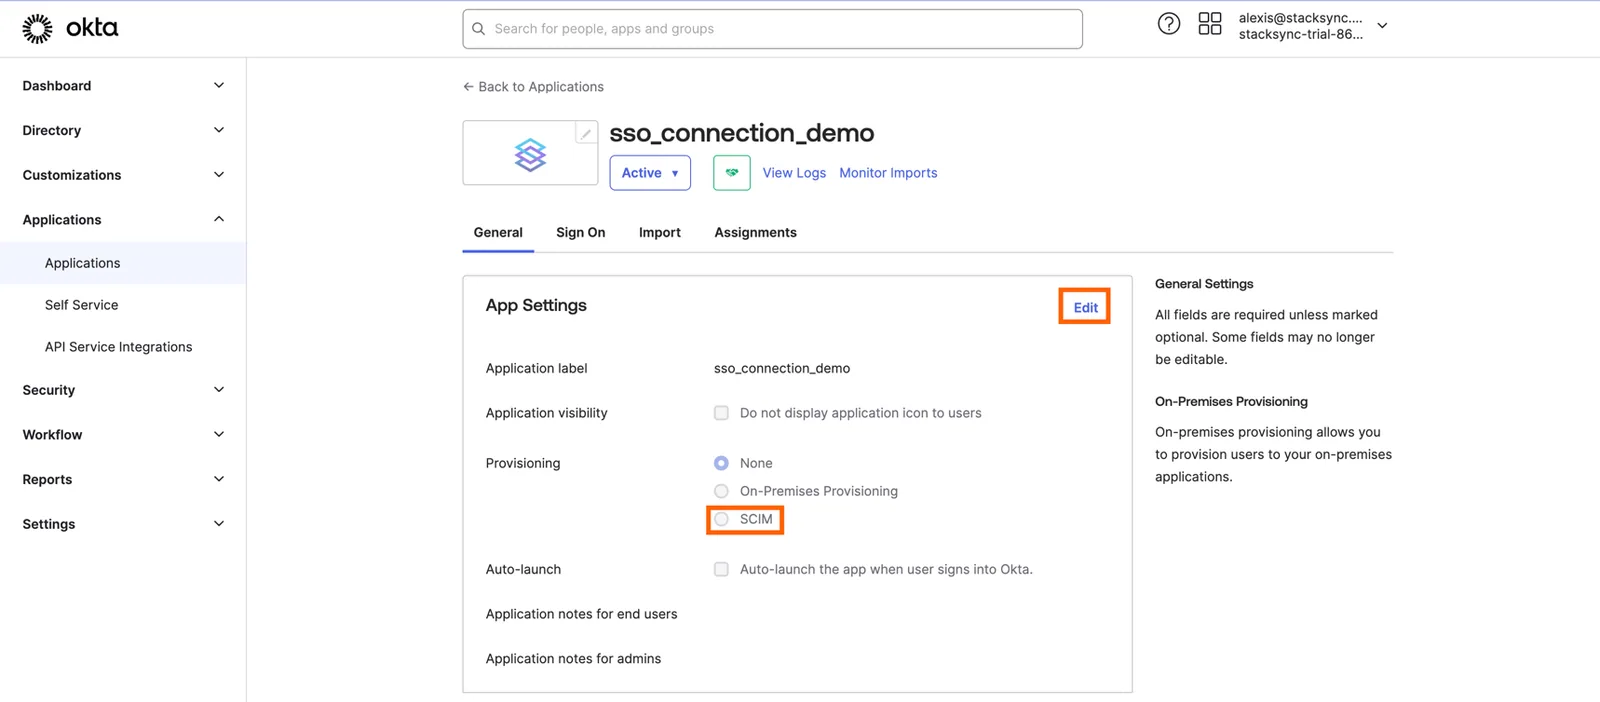
On the General page of the SAML app you just created, enable SCIM provisioning.
-
Go to the Stacksync Workspace Settings page at
https://app.stacksync.comto find the information needed for the next steps.-
Find your Stacksync
workspace_idon top of the page.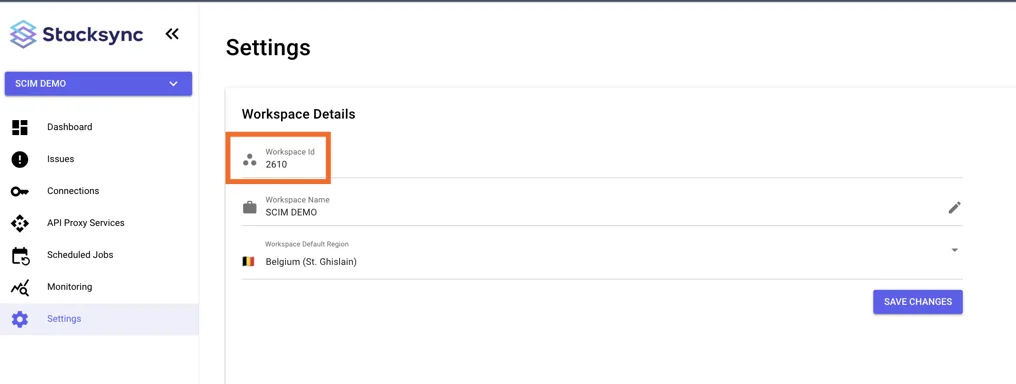
-
Generate a
workspace_api_keyat the bottom of the same page. Only the owner of the Stacksync workspace can create workspace API keys.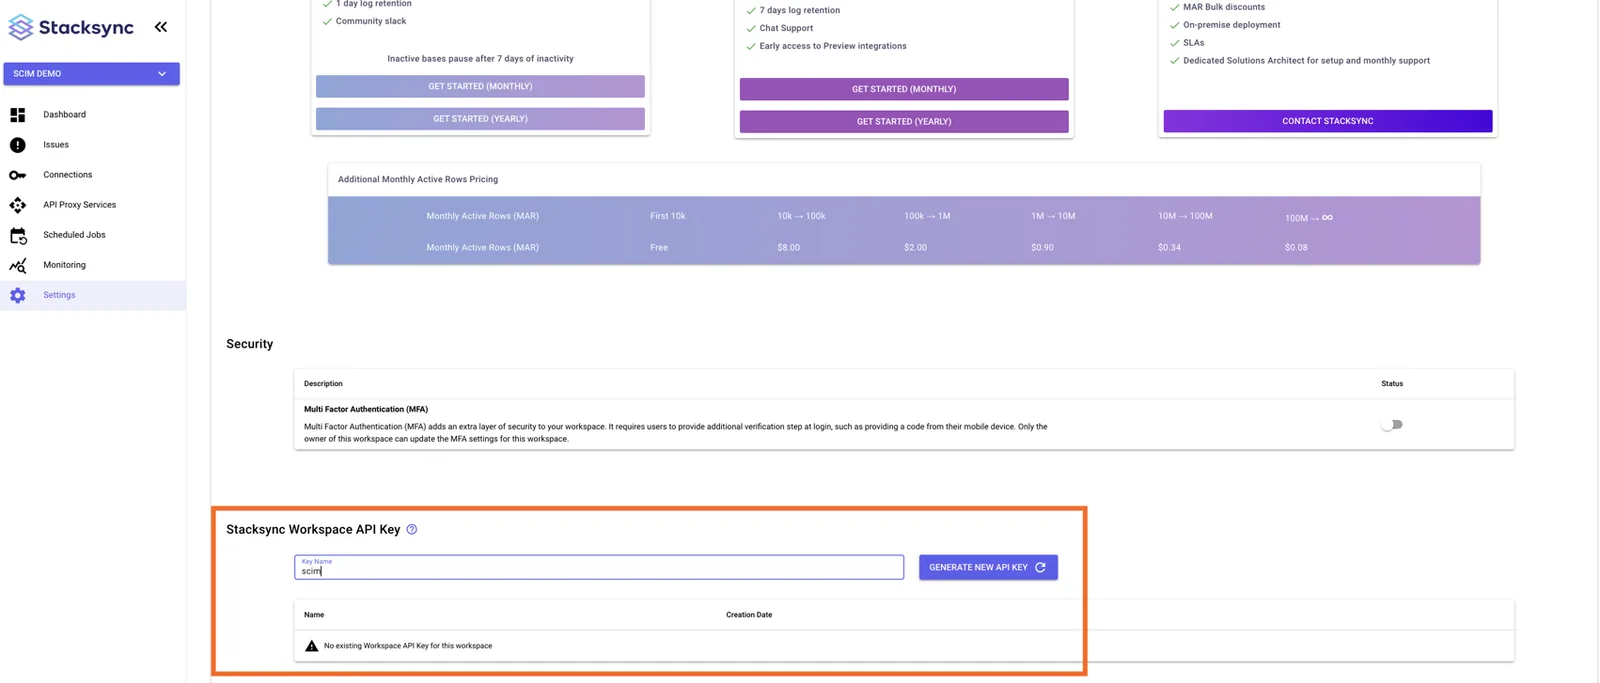
-
-
Go back to your SAML app on the Provisioning page. Fill in the following parameters:
-
Base URL:
https://api.stacksync.com/v1/workspaces/<your_stacksync_workspace_id>/scim/v2/ -
API Token:
Bearer <your_stacksync_workspace_api_key>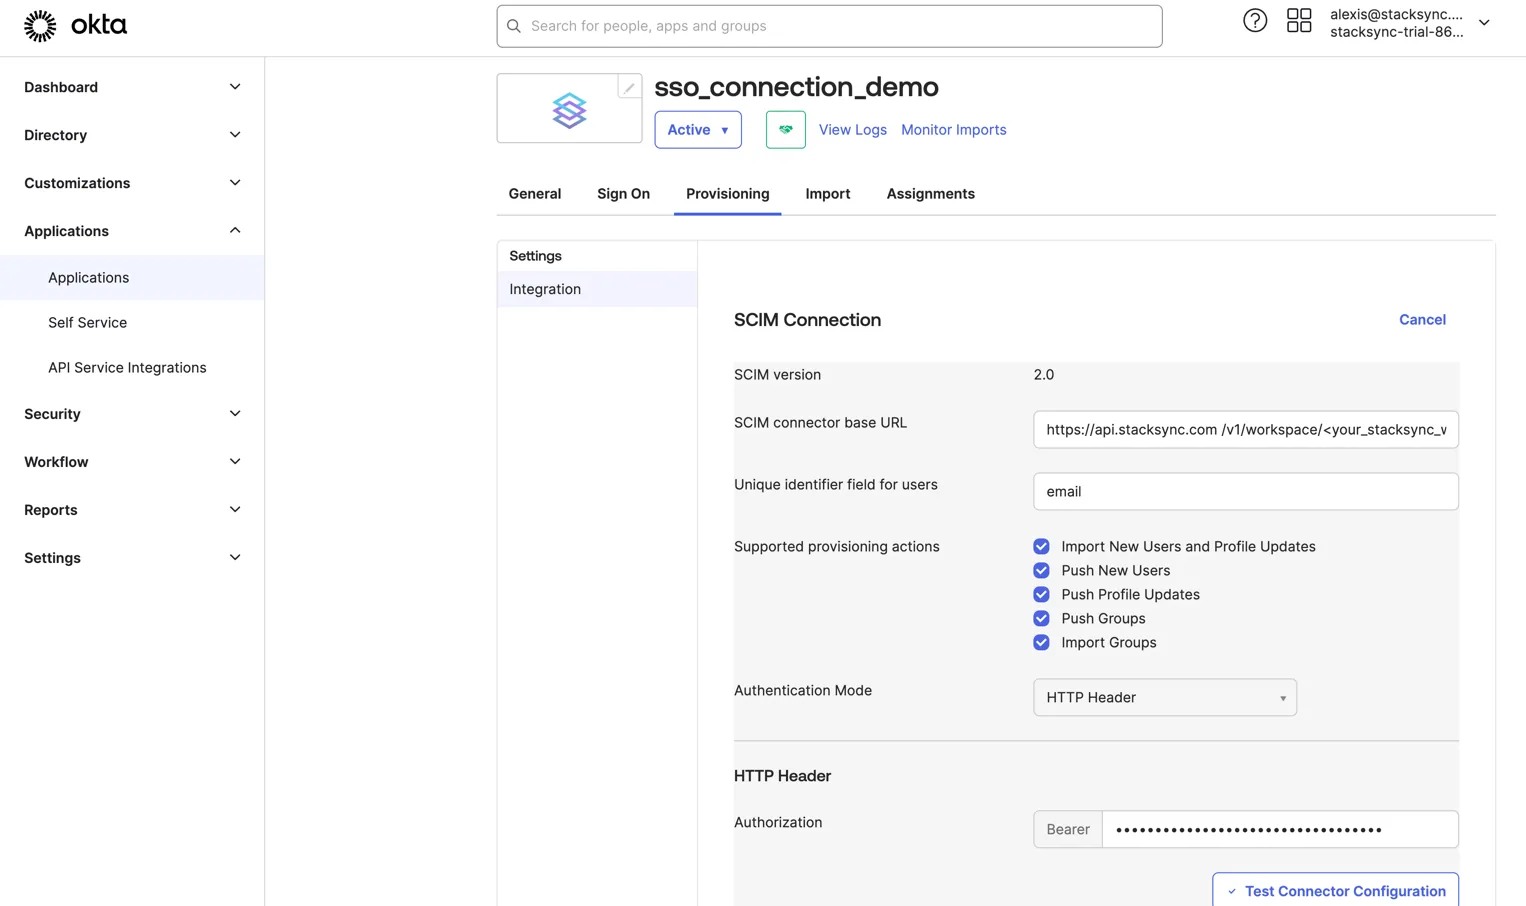
-
-
Allow your SCIM app to create, update, and deactivate users. Stacksync users never use passwords to connect to Stacksync. Therefore, the
Sync Passwordfeature should be disabled.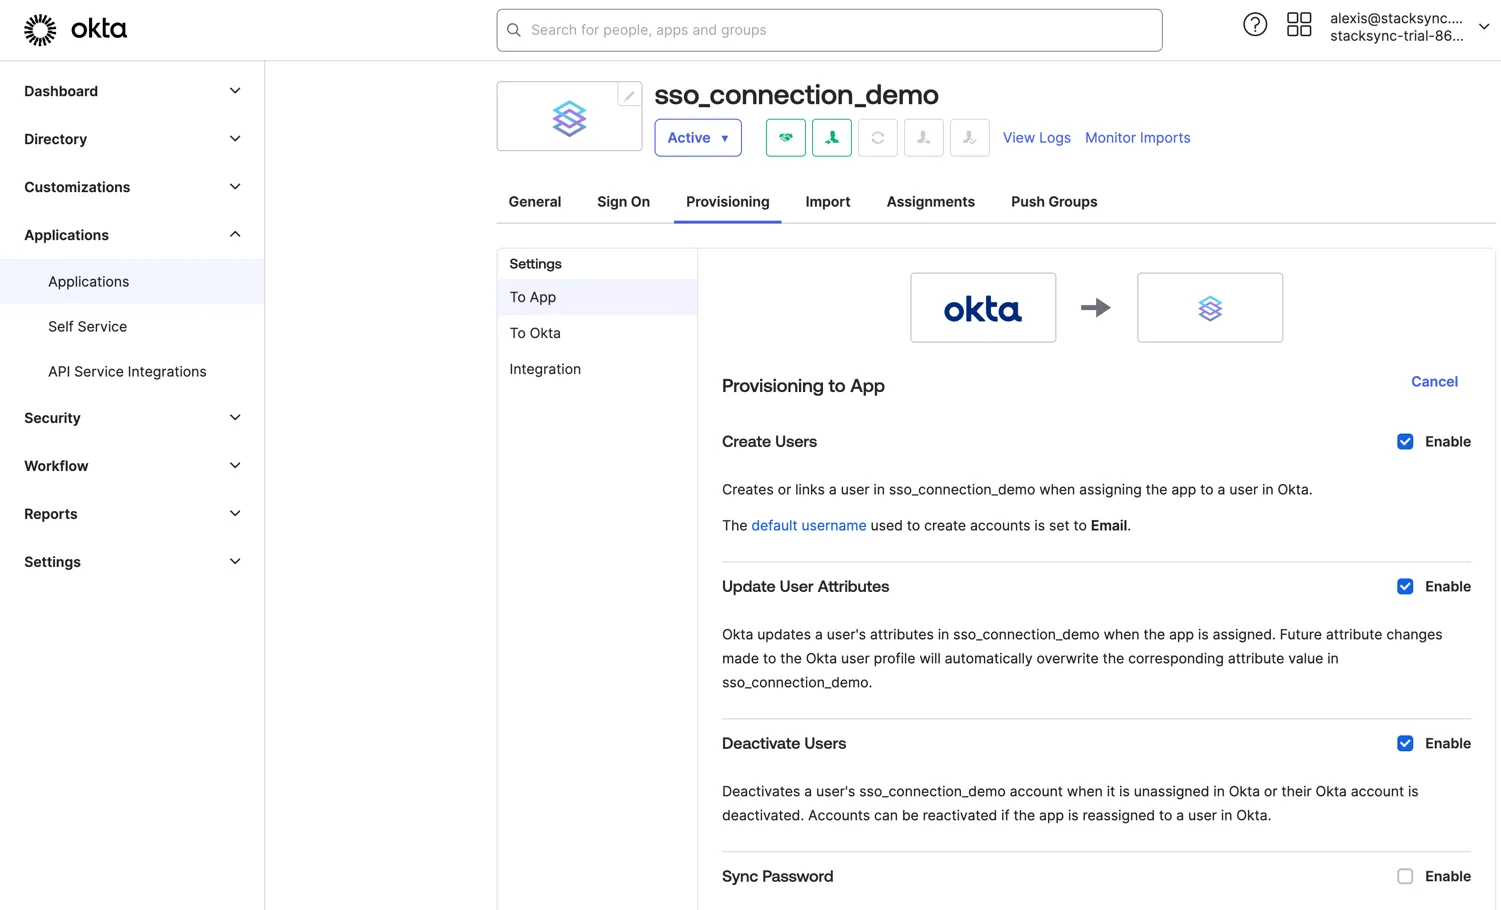
-
Go to the Profile Editor and add a new attribute
rolesto the app. This is a standard SCIM attribute with the following fields:-
Data type:
string array -
Display name:
roles -
Variable name:
roles -
External name:
roles -
External namespace:
urn:ietf:params:scim:schemas:core:2.0:User -
Description:
SCIM role attribute for Stacksync app -
Enum:
true -
Attribute member:
viewerandeditor -
Attribute required:
true -
Attribute type:
Group -
Group Priority: Use
Group Priority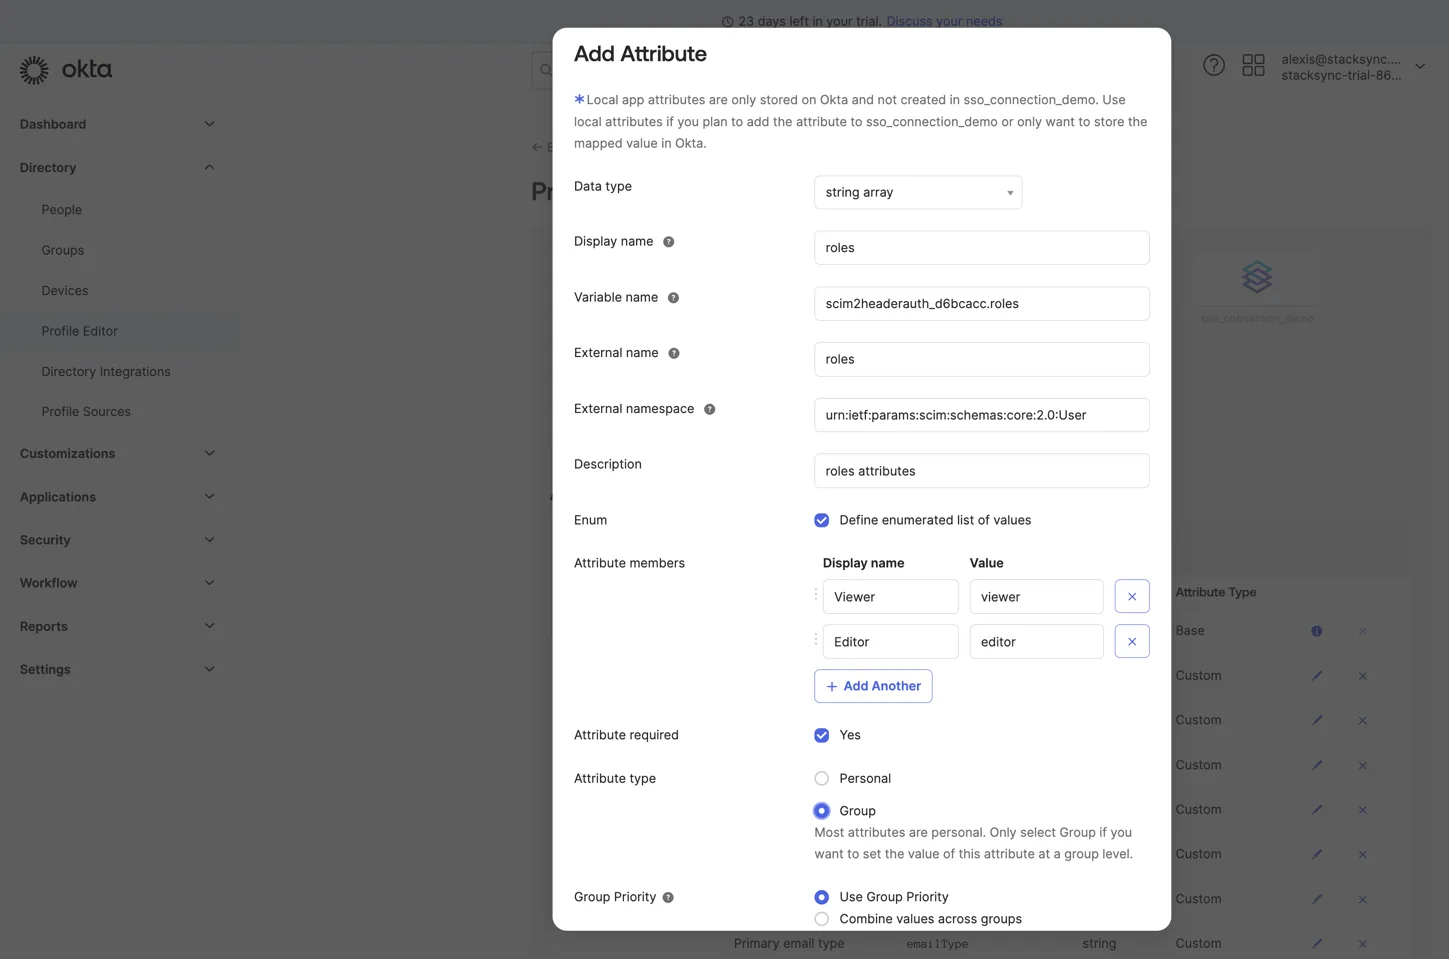
-
-
Go to Directory/Groups and create two groups:
Stacksync EditorsandStacksync Viewers. Each group will be assigned a different role in Stacksync (editorandviewer).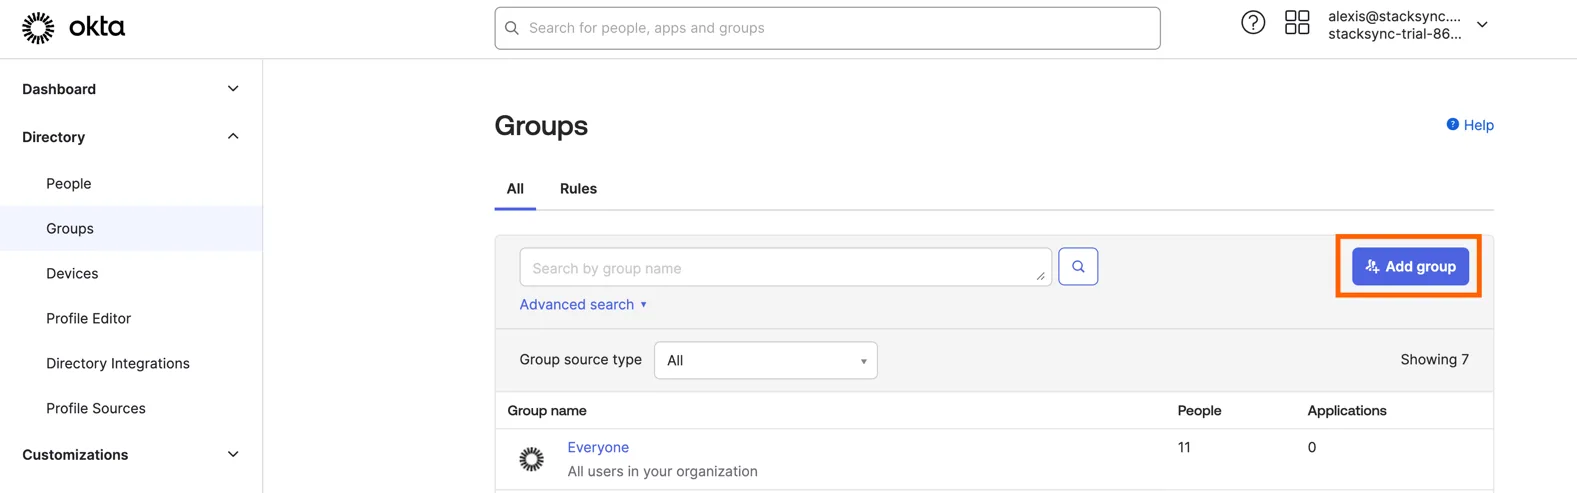
-
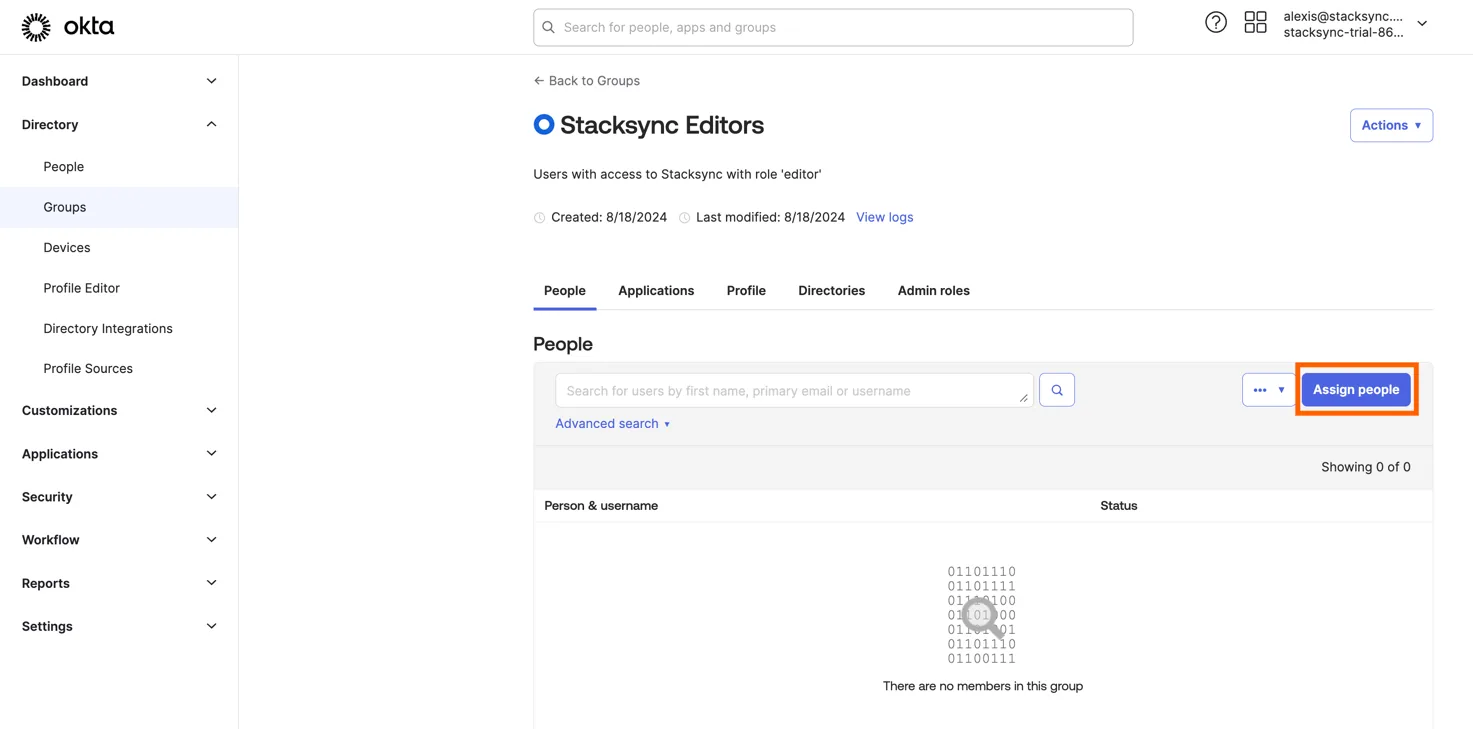
Assign the people you want to give access to Stacksync to the Stacksync groups you just created.
-
Go back to your application and, under
Assignments, assign these two groups to the application. Make sure you select the right role for each group. You can ignore the other fields. Stacksync does not read them.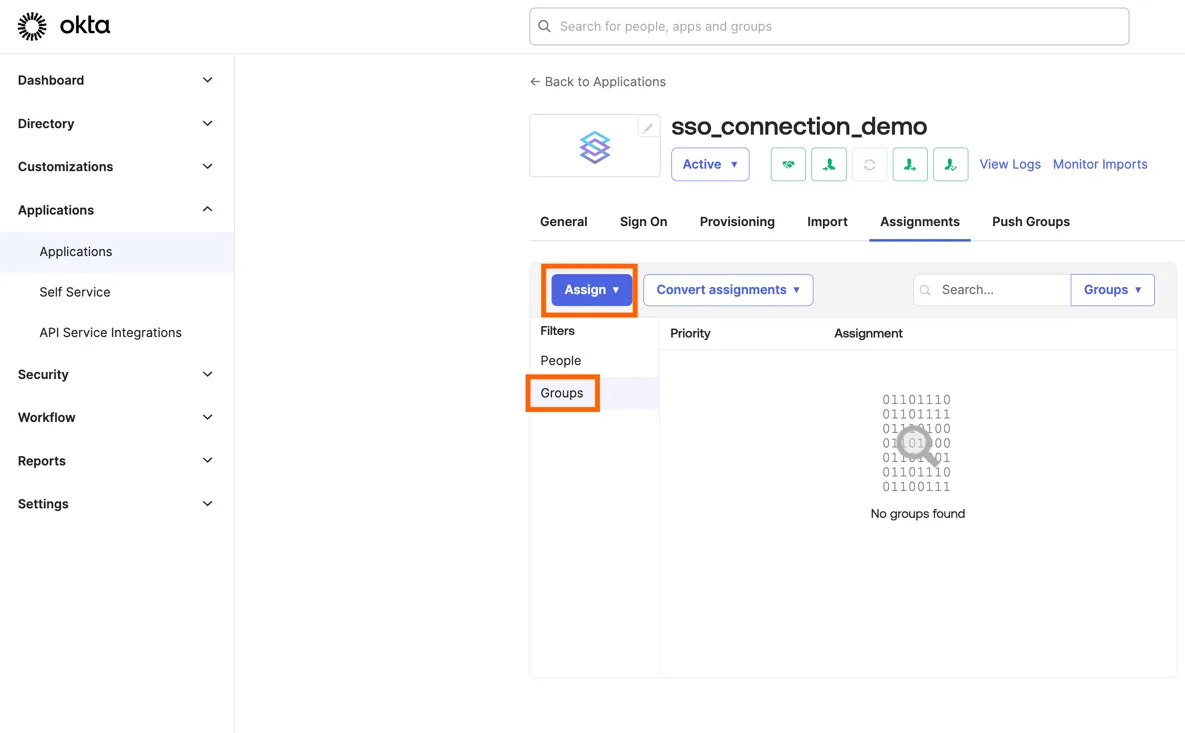
That's it! 🎉