

App Triggers
Stacksync continuously watches the connected app for changes using Change Data Capture (CDC). The moment a record changes, Stacksync captures the event and starts your workflow with that record's data typically within seconds.
Set it up
-
In your workflow, add a trigger and choose the App Trigger you want from the trigger catalog.
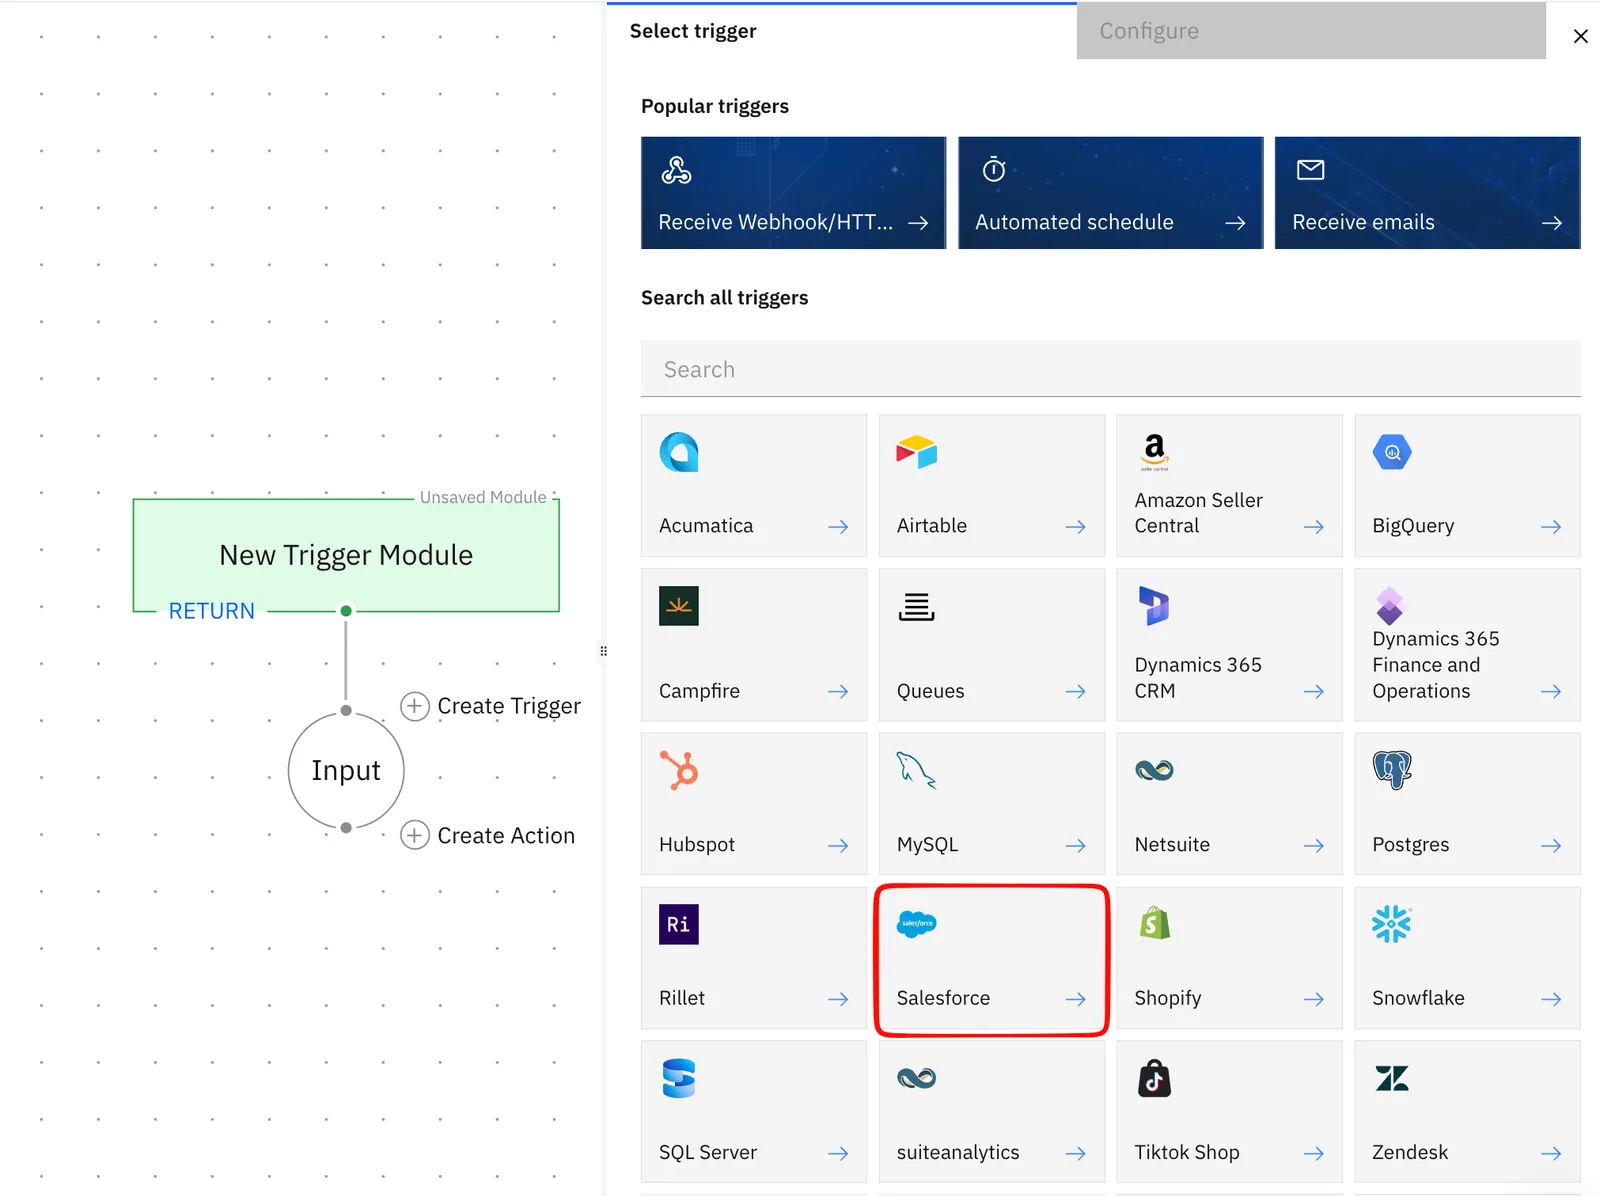
-
Select an existing connection or create a new connection and click next
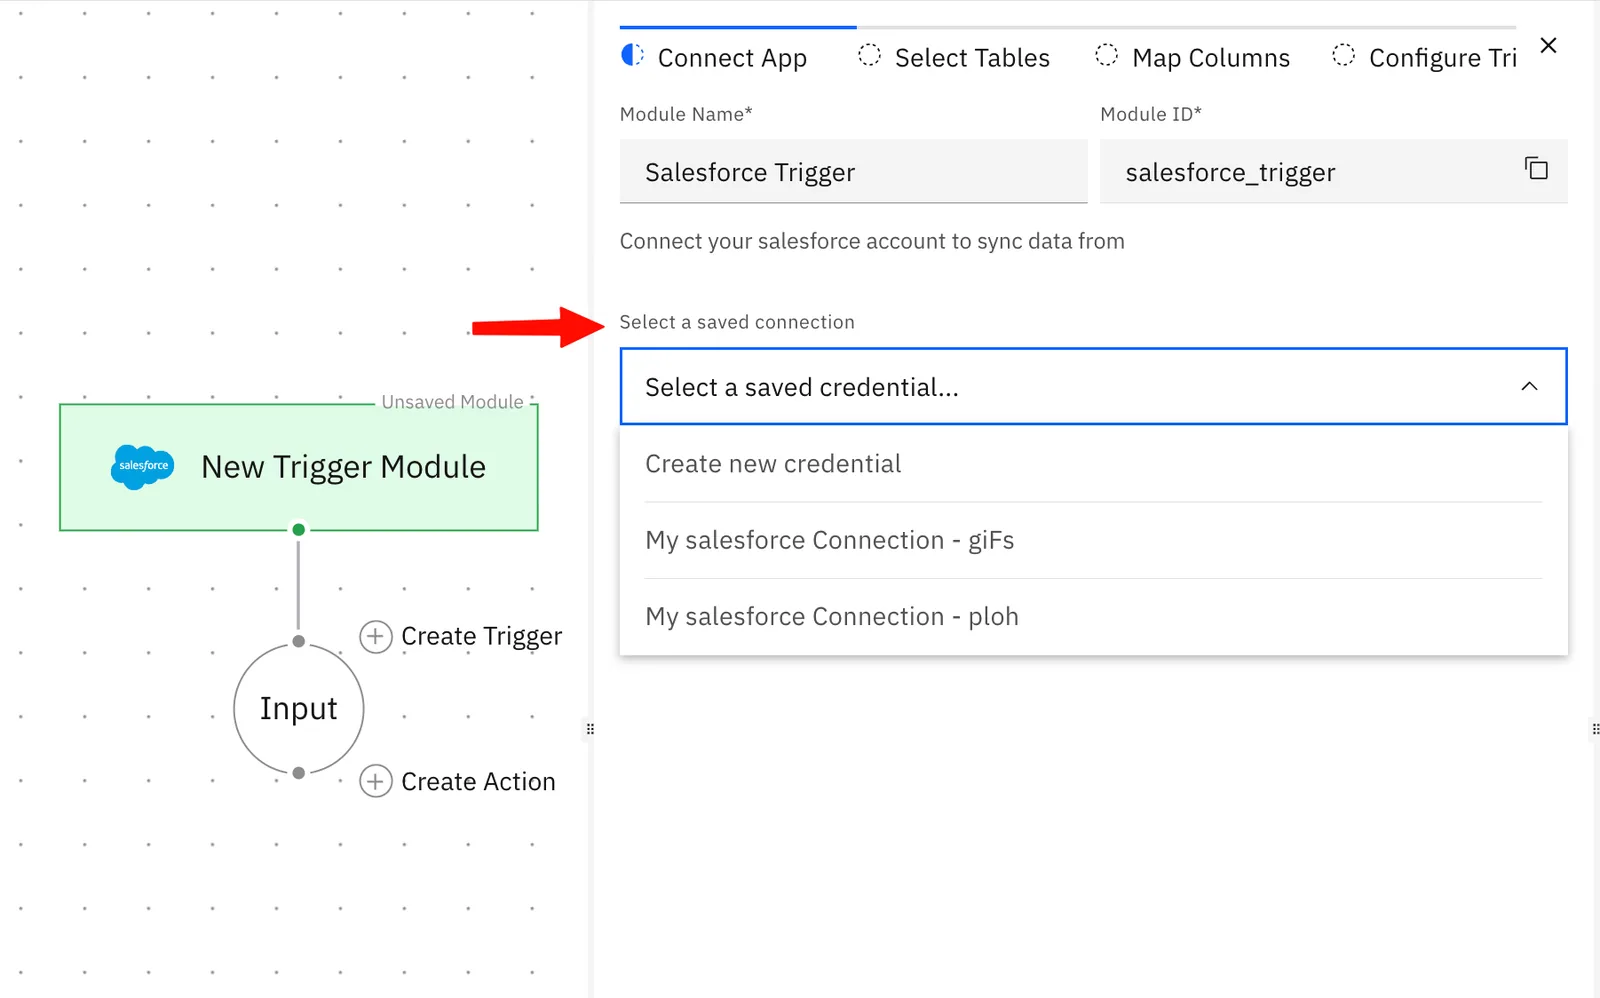
-
Choose the table(s) you want to capture the changes from.
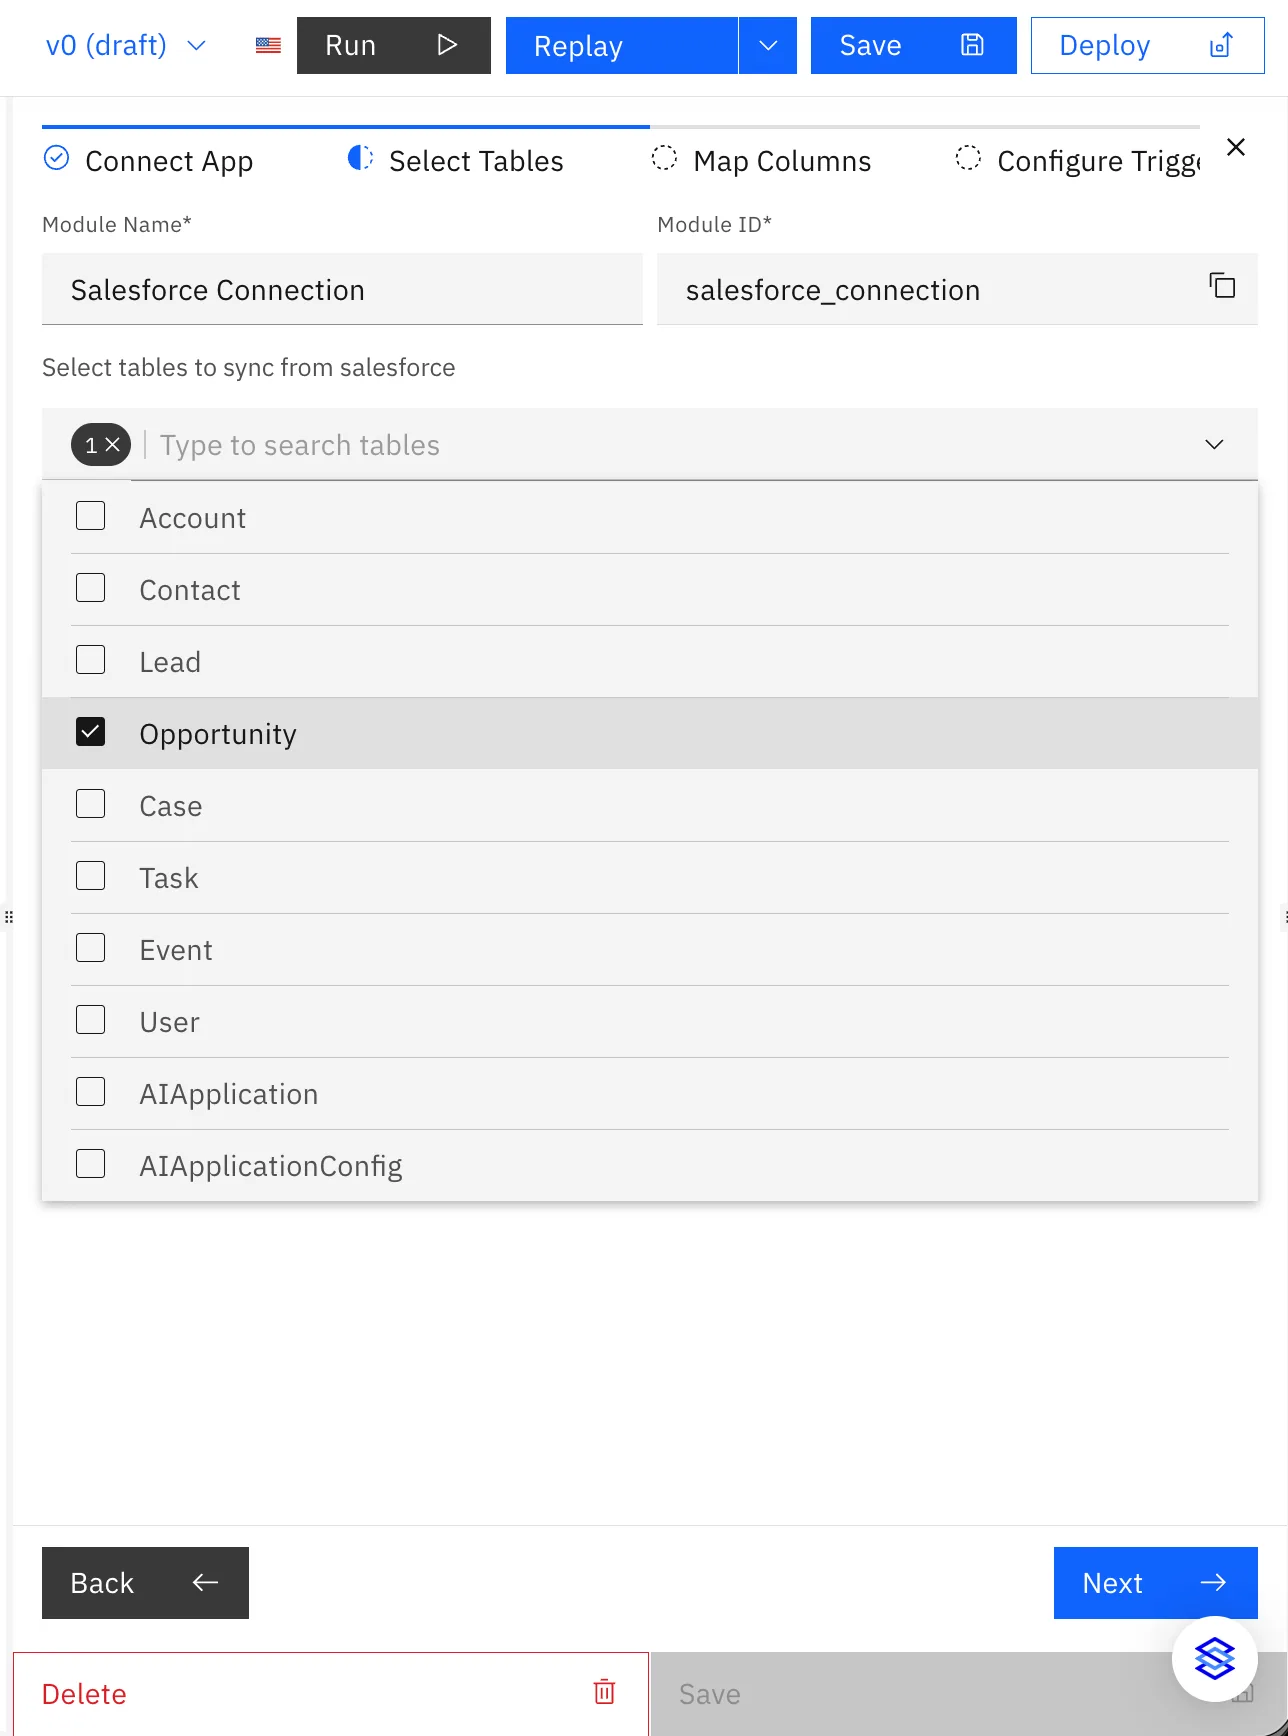
-
Choose the columns you want to track. By default, all the columns are selected, you can edit them as required.
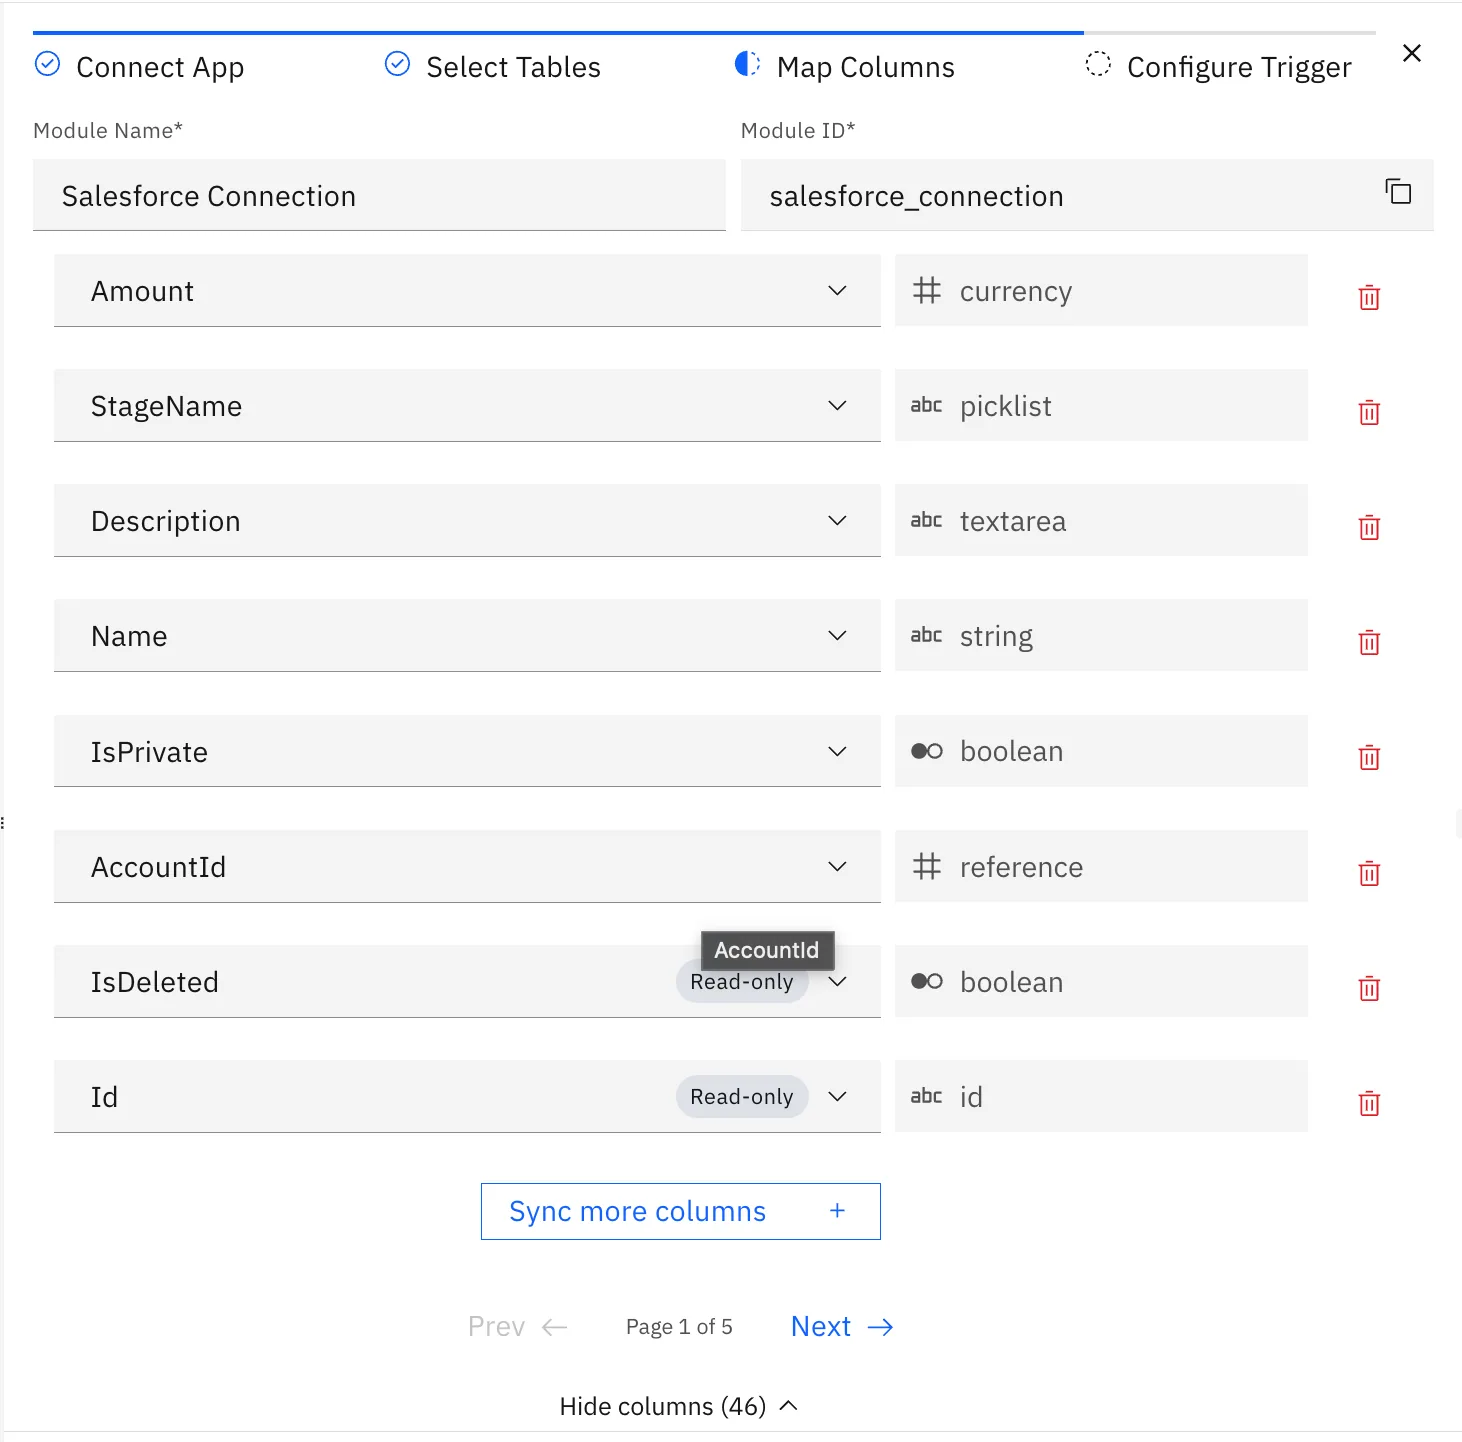
-
Configure the Trigger
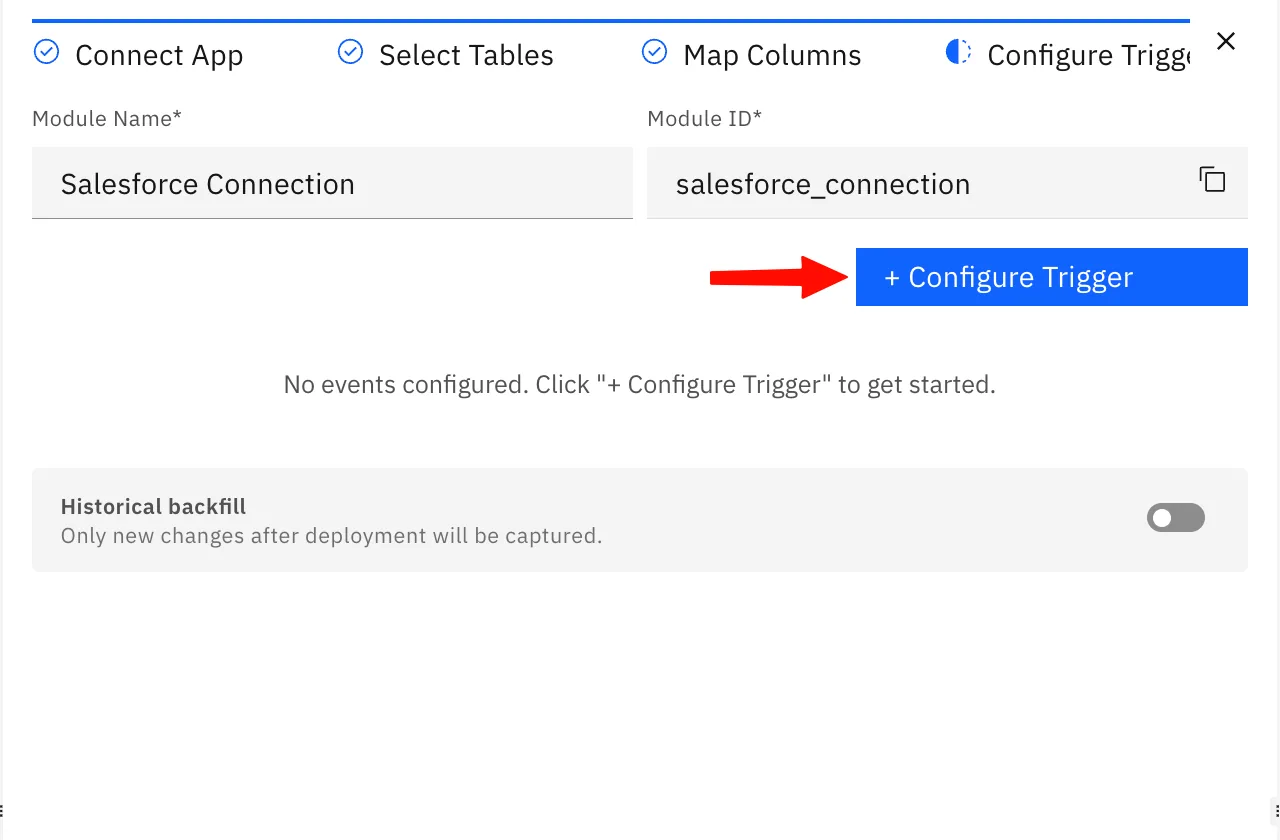
-
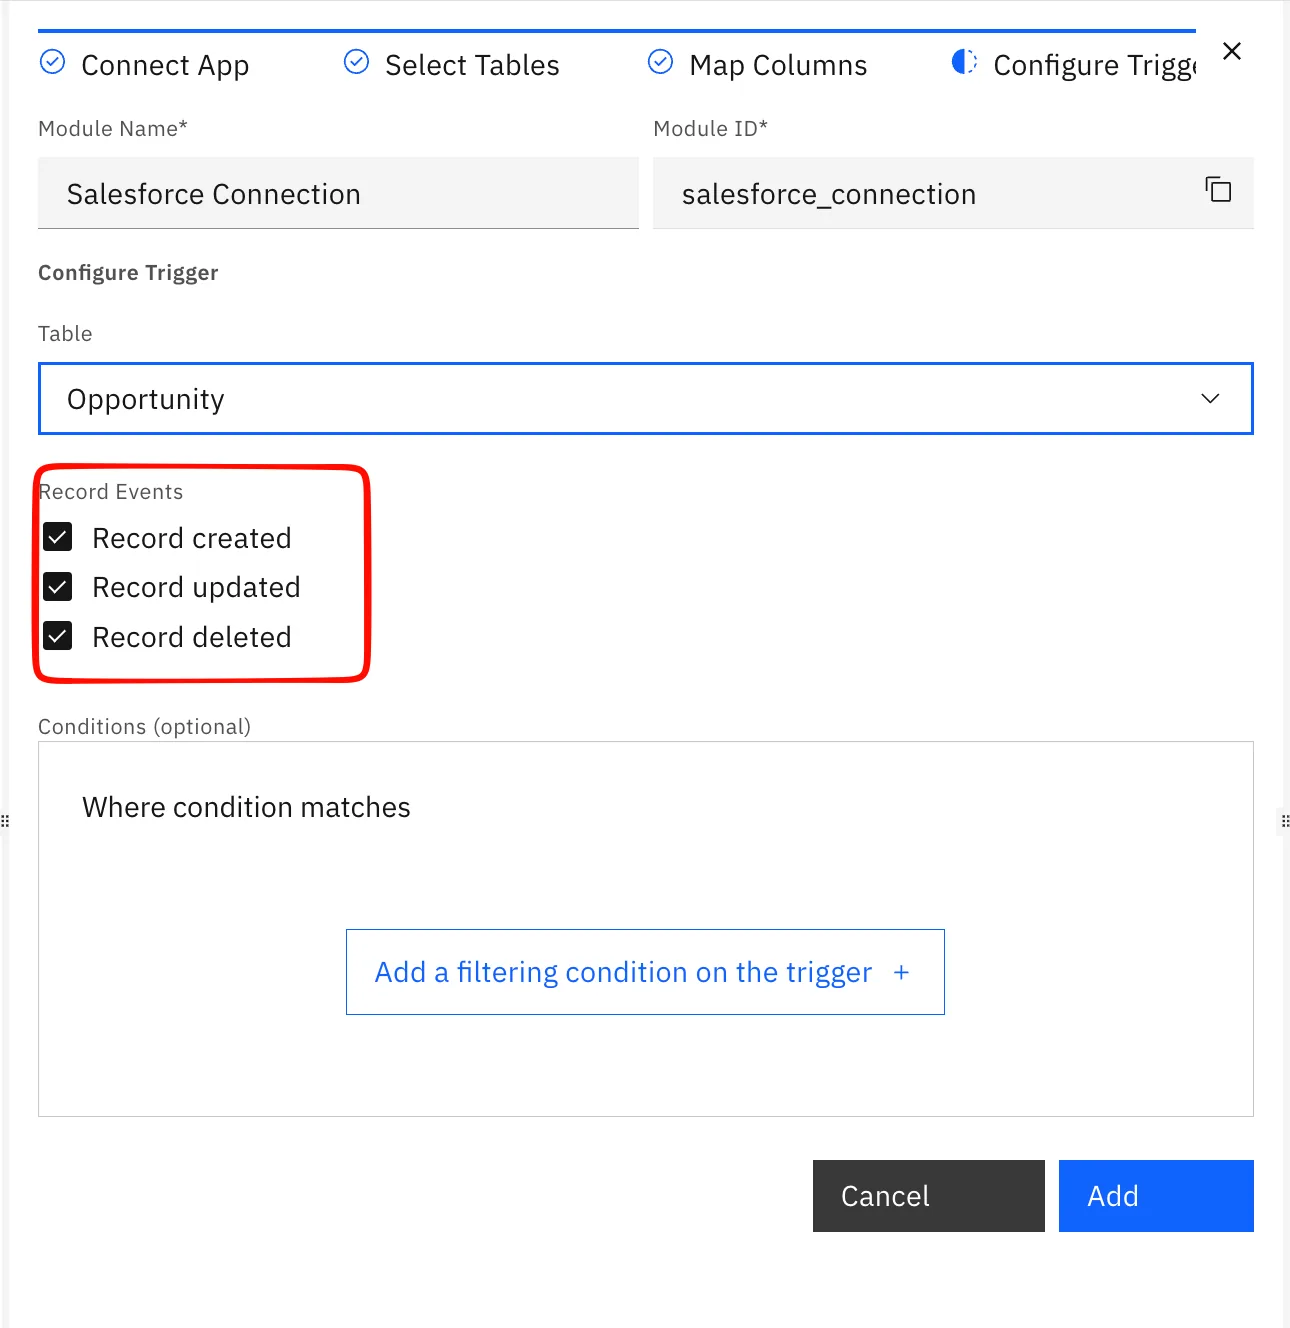
Pick the event types (Created, Updated, Deleted).
-
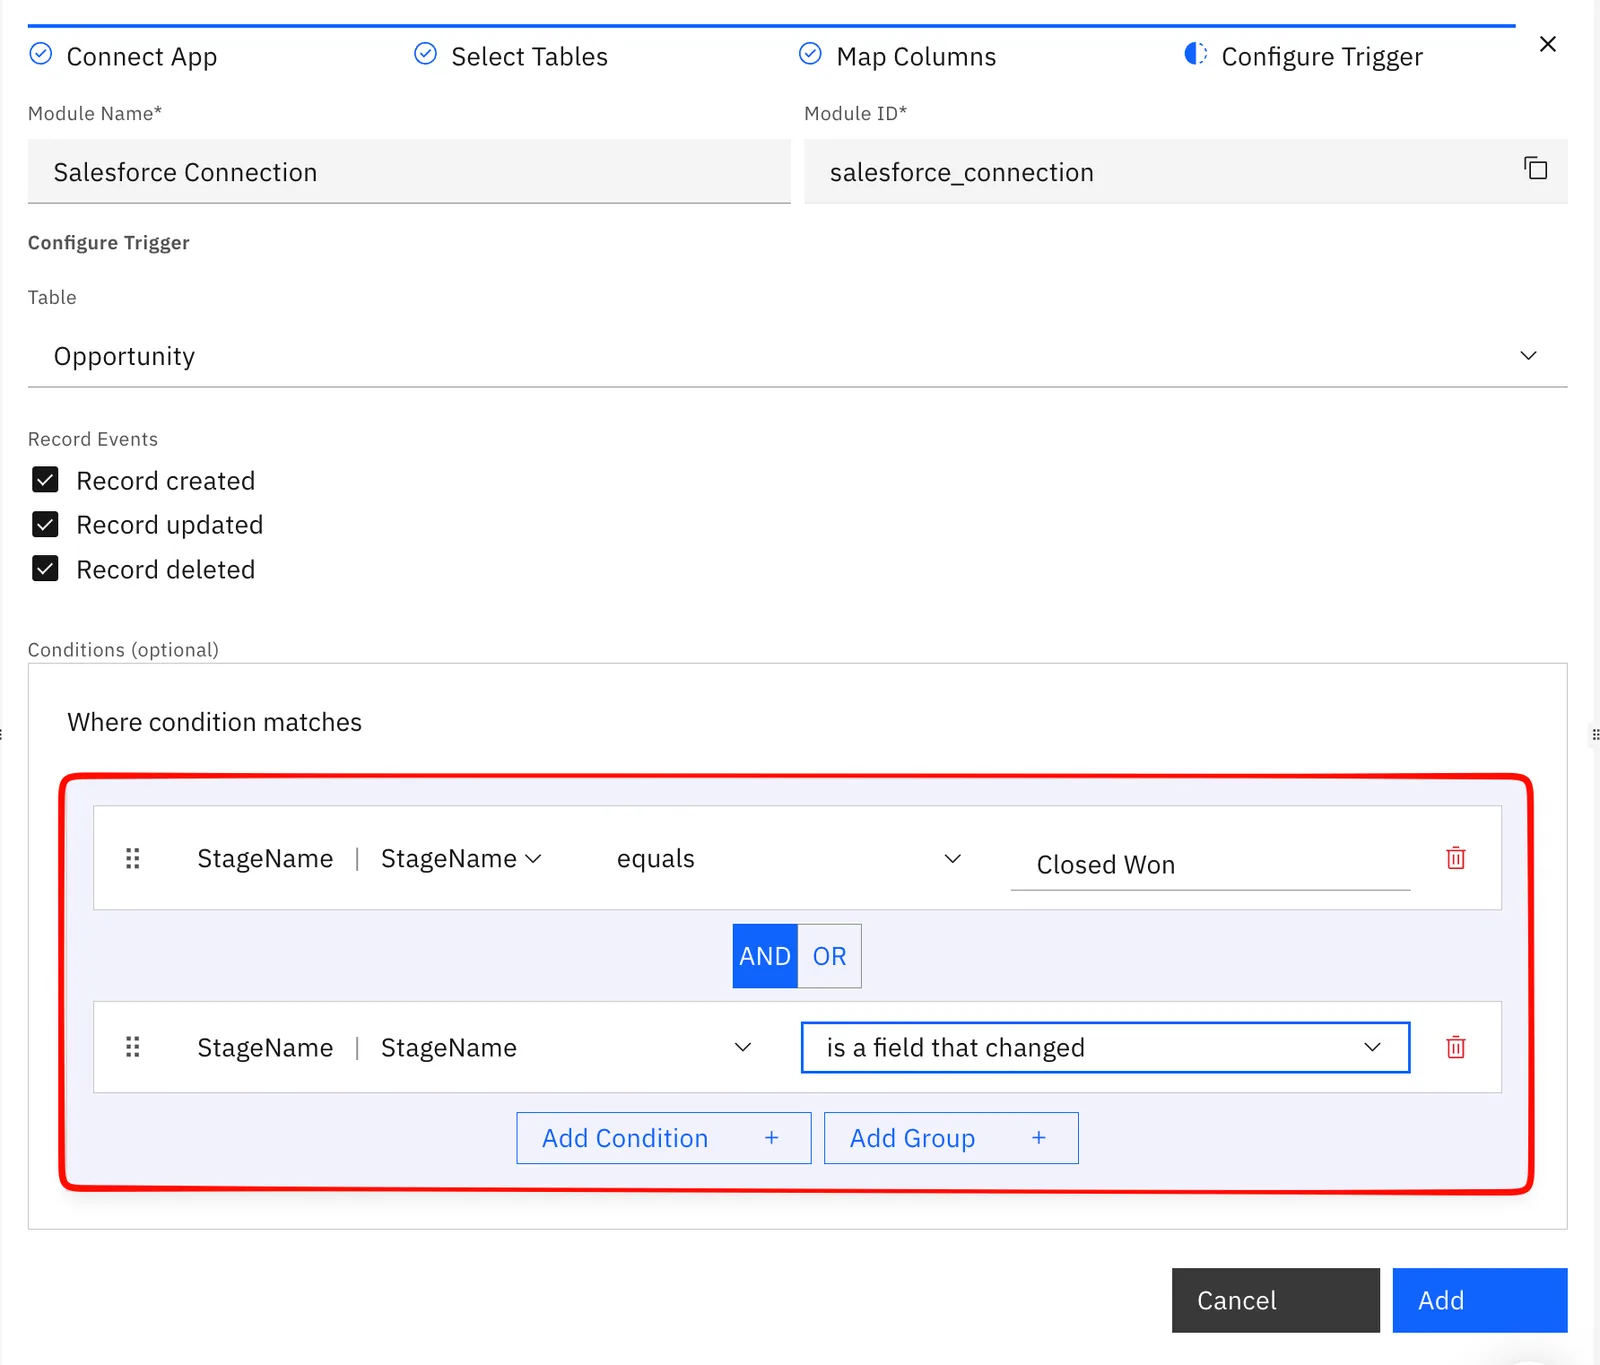
Add filter conditions so it fires only on relevant changes.
-
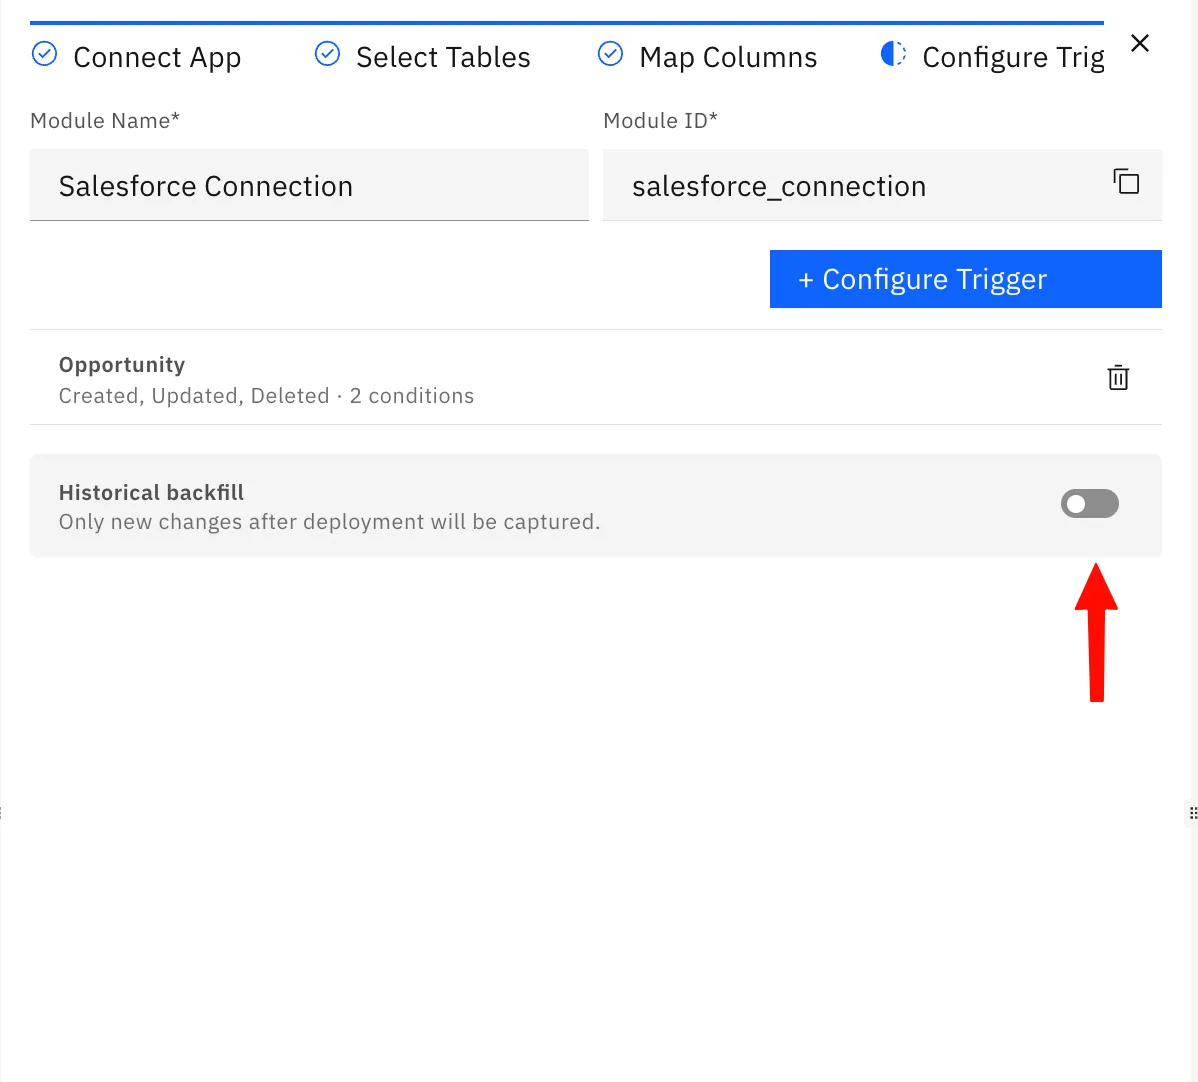
(Optional) Enable historic backfill to include existing records.
-
Save and turn the workflow on.
App Triggers fire on three event types:
| Event | Fires when… |
|---|---|
| Created | A new record is added |
| Updated | One or more fields on a record change |
| Deleted | A record is removed |
You can pick any combination of the three.
What your workflow receives
Each time the trigger fires, it passes the event into your workflow so downstream modules can use it:
record- the full record, with all its fields.changes- only the fields that changed (on update events).
Reference these anywhere in the workflow to route, transform, or write the data into another system.
Filter conditions
You usually don't want the workflow to run on every change. Add filter conditions so it only fires when the change actually matters. For example, you can trigger the Salesforce trigger only when status becomes Closed Won, or only when amount is above a threshold.
- Build conditions in the no-code editor using AND / OR logic.
- Nest conditions as deeply as you need for precise targeting.
- Only changes that match the filter start the workflow and everything else is ignored.
Historic backfill
By default, an App Trigger only processes changes that happen after you turn it on. If you also want to run the workflow over records that already exist, enable historic backfill.
- Go-forward (default): only new changes from this point on.
- Backfill: Stacksync replays your existing records through the trigger once, so the workflow processes the back-catalog too.
Backfill can generate a large number of executions on objects with many existing records. Apply filter conditions first, and start on a smaller object if you want to validate behavior before backfilling everything.
Questions about setting up an App Trigger? Reach us in the Slack community or at hello@stacksync.com.