

Automated Schedule
The Automated Schedule trigger runs your workflow automatically at a configured time interval. No incoming data or HTTP request is needed and the workflow fires on its own.
1. Add the Trigger
1.1 Create a workflow and click Create Trigger.
1.2 Select Automated Schedule from the trigger menu.
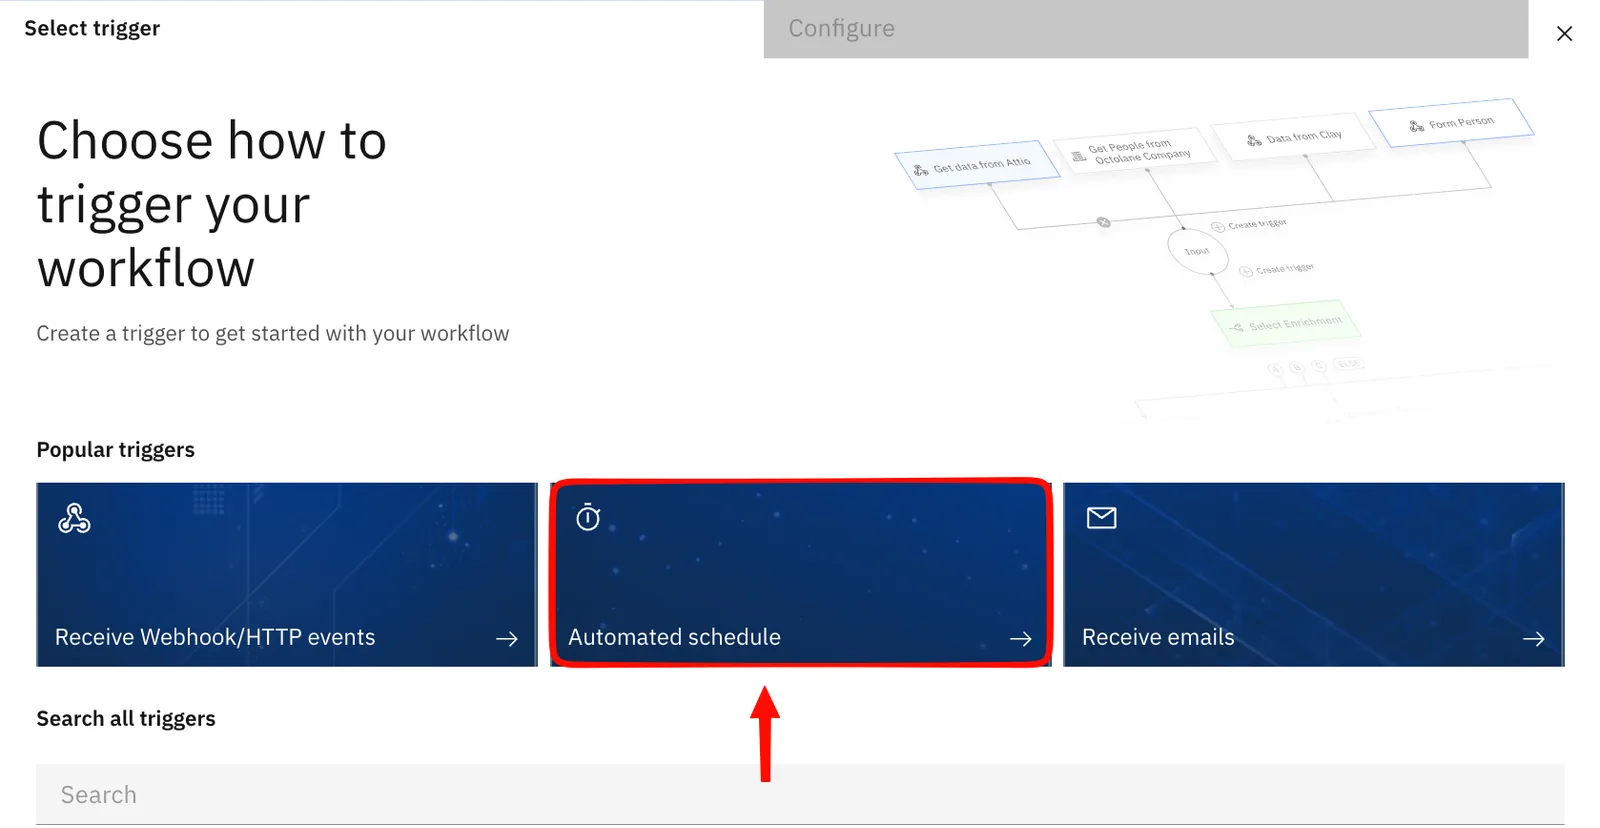
2. Configure your Schedule
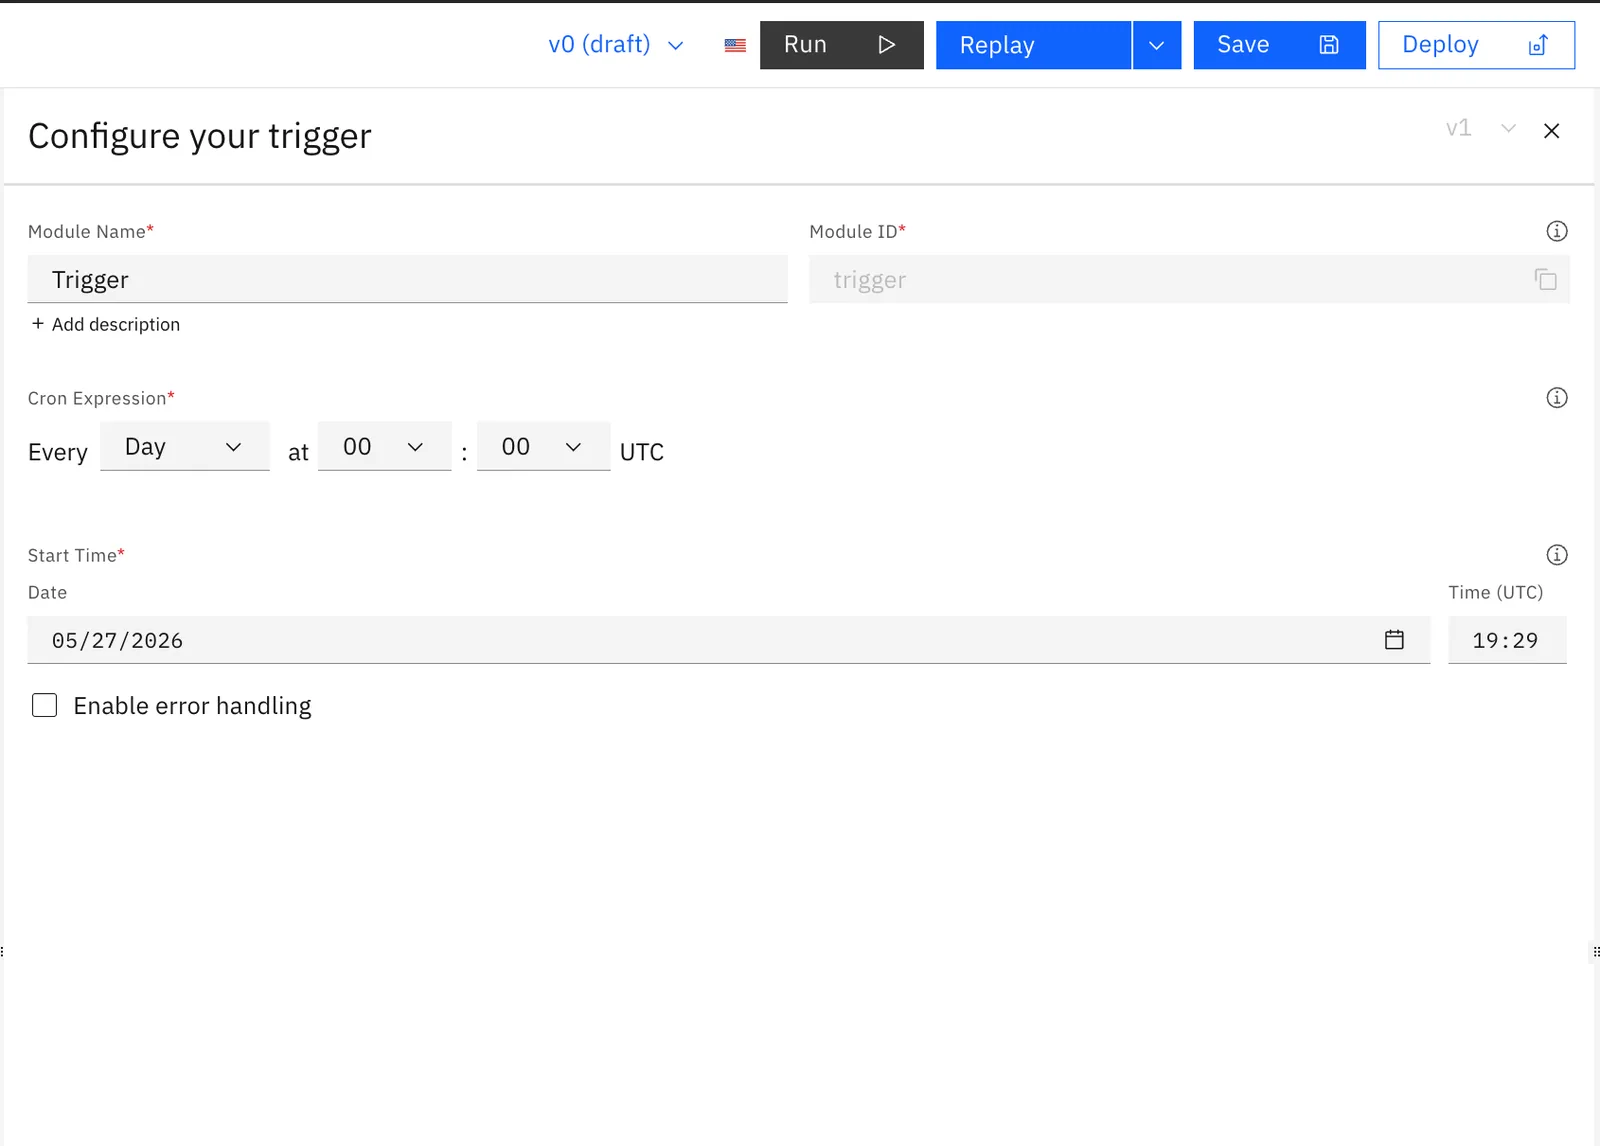
Fill in the following fields in the configuration panel:
Module Name: give your trigger a descriptive name. The Module ID is auto-generated from the name.
Cron Expression: choose how often the workflow runs using the visual schedule builder. Select a frequency and set the time in UTC:
| Frequency options |
|---|
| Minute |
| Hour |
| Day |
| Week |
| Month |
| Year |
Start Time: set the date and time (UTC) when the schedule becomes active.
Enable error handling: optionally enable error handling to control workflow behaviour if an execution fails.
3. Save the Workflow
Save the workflow to activate the schedule. The workflow will automatically run at every interval defined by your cron expression from the configured start time.